Monday, August 30, 2010

Don't Cry For Me Argentina


“Are you sure you want to have a big dinner party on Saturday?” I typed.

But I knew what her answer would be before it landed in my inbox.

“Yes. I need to stay focused,” She wrote.

I knew because it was the same answer I would have given.

The simple truth of cooking is that it’s not always a means to an end. The act itself is what we seek.

In The Solace of Open Spaces, author Gretel Ehrlich writes of the healing power of the vast Wyoming landscape. She’d moved there after suffering a personal tragedy and found to her surprise that backbreaking ranch work woke her up rather than dulled her senses as she’d hoped. “The vitality of the people I was working with flushed out what had become a hallucinatory rawness inside me. I threw away my clothes and bought new ones; I cut my hair. The arid country was a clean slate. Its absolute indifference steadied me.”

This weekend my friend’s succor would be found closer than the red-earthed mesas of a high desert.

“Are you sure I can’t bring something?” I asked.

“I’ve got it covered. I roasted beets last night for empanadas.”


I pictured her in her yellow kitchen rolling out empanada dough on a floured counter top, reaching over to gently stir the filling sautéing on the stove; cutting circles from the dough, stuffing the discs, pinching the edges, baking. The slow, methodical process rounding off the edges of her worry.

These days the paychecks don’t quite stretch two weeks. An aging parent asks me now, “Are you a neighbor?” And so, those quiet moments in the kitchen caramelizing onions, shelling favas, stirring risotto, corral my thoughts. The unhurried, familiar tasks point me inward and leave me centered.

On this morning, a husband’s pathology results didn’t arrive as promised, a beloved daughter was leaving too soon for a year abroad, a son’s wife was in labor an ocean away and a father with all his blustery presence was arriving for a visit in the morning.

“I need to cook.” She said, simply.

And I understood.

Later, the warm embrace of friendship around the dinner table, laughter. As we raise our glasses to that singular good fortune, warm empanadas waiting, we both say a silent toast to effort well spent and the solace of counter spaces.


This recipe for Swiss Chard, Beet and Goat Cheese Empanadas comes from www.laylita.com.

12 medium size or 20 small empanada discs

4 small beets, peeled, boiled until tender and diced

1 bunch of swiss chard, chopped

1 cup crumbled goat cheese

½ white onion, sliced

2 tbs olive oil

2 garlic cloves, crushed

1 tbs finely chopped fresh oregano

1 egg, yolk and white separated and lightly whisked

Salt to taste

Preparation:

  1. Heat the oil and sauté the onions and garlic for 3 minutes.
  2. Add the chopped swiss chard and cook for about 5 minutes, stirring occasionally.
  3. Remove from the heat, cool down and mix with the diced beets, crumbled goat cheese and chopped oregano.
  4. To assemble the empanadas spoon the stuffing on to the center of each empanada disc.
  5. Brush the inside edges of the empanada discs with the egg whites, this is will help them seal better and keep the filling from leaking while baking .
  6. Fold the empanada discs and seal the edges, use a fork to help seal the empanadas.
  7. Lightly brush the top of the empanadas with the egg yolk; this will give a nice golden glow when they bake.
  8. Chill the empanadas for at least 30 minutes, this will help them seal better and prevent leaks.
  9. Pre-heat the oven to 400 F and bake for 20-25 minutes or until golden.
  10. Serve warm with Creme Fraiche Sauce

Creme Fraiche Sauce

Ingredients:

8 oz crème fraiche

1 medium sized bunch of mint, about ½ cup coarsely chopped

¼ cup coarsely chopped cilantro

¼ cup coarsely chopped parsley leaves

2 garlic cloves

1-2 serrano or other hot peppers, seeded

3 tbs lemon juice, about ½ lemon

Salt to taste

Preparation:

Place all of the ingredients in the blender and blend well, the sauce will be very liquid after you blend it, but if you return it to the refrigerator it will thicken.

If you can find frozen empanada discs in California - please let me know where. If like me, you live in an area where empanada discs are non-existent, here is a recipe also from Laylita that is delicious and flaky.

Empanada Dough

Ingredients for 15 medium size or 25 small empanada discs:

3 cups all purpose flour

¼ teaspoon salt

6 oz unsalted butter (1 ½ sticks), cold and cut into 12 pieces

1 egg

4-5 tbs water

Preparation:

  1. Mix the flour and salt in a food processor.
  2. Add the butter, egg and water until a clumpy dough forms.
  3. Form a ball and chill in the refrigerator for about 30 minutes.
  4. Roll out the dough into a thin sheet and cut out round disc shapes for empanadas (use round molds or a small plate).
  5. Use immediately or store in the refrigerator or freezer to use later.

Sunday, August 22, 2010

Blogs and Fog

We’re slowly getting the hang of this blog thing.

One of these days we’ll figure out how to do captions and get all the fonts the same size. The other key thing we need to remember to do is to take a photo of the finished dish. By the time the cooking is done, we’re thinking about a glass of wine and we’d rather dig in than dig out the camera. Such is the case with the following recipe.

We’re noticing a trend beginning to emerge with Holy Mole and that’s a distinct proliferation of Latin inspired dishes. It must have something to do with the unrelenting fog here on the Central Coast that has plagued us this summer. So, we tend to take refuge in our food. The sunny colors of citrus, smoked paprika and dried chiles substitute for absent sunsets. A little heat on our tongues transports us to balmier locales.

Last night we attended a tenth anniversary party for some old friends and basked in warmth of a different kind.

As we drove up the coastal valley to the couple’s hilltop ranch, I wondered, “Who will I know?”

Later, as I perused the buffet table heaped with offerings made with love and well wishes I realized it didn’t matter. That evening I was reminded again and again of the unifying force of cooking as new friendships were forged through common ground. Kinship with strangers was quickly established: A playful debate over the proper temperature for a new york strip, the magical properties of true Chimayo chile, an oral recipe swap by firelight, ferreting out the secret ingredient in a perfect chocolate chip cookie.

When the full moon rose and the campfire faded we prepared to leave. Nearby, a new mother juggled infant twins. As we drove down back down the dusty road I wished for these babies that they are graced in life by friends who celebrate the warmth of these little moments.

These carnitas are warming and satisfying and if you can talk your partner into washing the dutch oven when it’s time to do the dishes you should consider yourself lucky. You’ll see in the photo an overnight soak might be in order. Fortunately, the results are well worth the dirty pan.


I’ve been making the accompanying Avocado-Tomatillo salsa all summer long. Its sunny zip compliments any taco perfectly and the leftovers are wonderful on eggs the next morning.

Tacos of Carnitas Roasted with Orange, Milk, and Pepper

Adapted from a recipe by Deborah Schneider
Amor y Tacos: Modern Mexican Tacos, Margaritas, and Antojitos

Schneider writes, “Pork cooked this way is moist and succulent, sweet from the natural caramelization of the milk, with the slightest hint of orange and black pepper. For an over-the-top garnish, crumble chicharrón (fried pork skin) on the soft roast meat for a porky, crunchy textural contrast.”

Serve the carnitas with warm corn tortillas, a raw tomatillo avocado salsa, and extra onions and cilantro if desired.


Serves 6

3 pounds boneless pork shoulder (butt) or boneless country pork ribs
1 tablespoon peanut oil, olive oil or lard
1/2 teaspoon salt
1 orange, well washed, cut in half
1 cup whole milk
About 2 cups water
1/2 teaspoon fresh-ground black pepper
Warm corn tortillas

Tomatillo-Avocado salsa, recipe follows


1. Preheat the oven to 350 degrees.
2. Cut the pork into 6 or 8 pieces. Heat oil or melt the lard in a heavy Dutch oven just large enough to hold the meat in one layer. Brown the meat on all sides and season with salt. If needed, brown the meat in batches, removing to a bowl as you rotate all the pieces in. Don’t overcrowd or the meat will steam instead of brown.
3. Squeeze the orange over the meat and toss the rind into the pan. Pour the milk over the meat and add enough water to almost cover the meat. Sprinkle with pepper. Cover tightly with aluminum foil and bake for about 2 hours, until the meat is fork-tender.
4. To finish, uncover the meat and break into into largish pieces. Remove the orange rind and discard. (note: I usually spoon some of the liquid off at this point if there’s a large quantity left in the pan) Roast, uncovered, until most of the liquid has evaporated, about 20 minutes, turning the meat with tongs occasionally to encourage even browning. Cook until the meat is brown and crisp on the edges.
5. To assemble the tacos, fill a warm tortilla with shredded pork. Top with avocado tomatillo salsa, a little of the chicharrón if using, and finish with generous amounts of onion and cilantro.

Tomatillo Avocado Salsa


10-12 large bright green tomatillos, husks removed and rinsed well, chopped.
½ small red onion, finely chopped
1 large bunch cilantro, leaves chopped (about a cup’s worth after chopping)
2-3 large, ripe Hass avocados, chopped
1 jalapeno chile, stemmed, seeded and minced. (or more to taste)
Juice of one lime
1 tsp salt

Mix all ingredients gently in a large bowl. The salsa can be made a couple of hours in advance. Refrigerate and allow to return to room temperature before serving.

Saturday, July 31, 2010

A Feast and a Fantasy

Long before Hoppe’s Restaurant in Morro Bay turned into Windows on the Water it was a great place to go for Sunday Brunch. I went one morning, two decades ago, with several girlfriends when we are all either new moms or about-to-be moms. It was a rare unfettered moment and we were giddy with our fleeting freedom.

The waiter recited that morning’s menu specials and the last entrée he described was accompanied by gratin dauphinois. I should mention that said waiter was especially handsome and especially charming and he pronounced gratin dauphinois with a perfect French accent. Without missing a beat, one of my friends, Muffy, leaned over to him, pointed to a spot on her neck just under her left ear and whispered in a husky voice, “can you say that again….right here?”

It was a classically funny moment and expressed perfectly what the rest of us were thinking.

These days, it’s fantasies of Javier Bardem whispering “carne asada” against a sweet spot in that lovely Spanish accent. But what makes it sexy is that it’s cheap, quick and easy. The carne asada. Not Javier.

When you need a cheap, easy dinner party idea that will feed a ton of people and won’t require lots of last minute prep it’s time to break out the secret weapon: Café Pasqual’s Carne Asada recipe. On a recent weekend, Kathy and I both coincidentally made a batch for respective dinner parties.

Last Halloween, I pre-prepared most of this meal for Juan’s boys night dinner at the house while the girls and I went out carousing. All Juan had to do was slap the meat on the grill and slice it up.


After dinner, our friend Carlos, who we suspect knows a thing or two about great Mexican food, told Juan it was the best carne asada he’d ever had. Of course it could have been the red wine talking but we’ll take a compliment when we can get it.

Seriously it’s a fantasy come true—5 minutes of prep and happy dinner guests.

This is our go-to meal for company. It’s dirt cheap and super simple. And all you need to do when it’s time to eat is grill the skirt steak for 5 minutes and heat up some tortillas.


It’s also one of the reasons we love Costco. They always have 3-4 pound packages of skirt steak (otherwise known as Loin Flap) for about $5.60 a pound. The cut is great for quick grilling and has enough fat for meaty flavor.


We recommend brushing corn tortillas with olive oil and grilling them quickly on the Weber. Serve the tacos with whole pinto beans and a green salad. The tacos themselves are best accompanied with a fresh tomatillo and avocado salsa or any other taco toppings you like.

Carne Asada
Adapted From Café Pasqual’s Cookbook


The chile powders called for in this recipe can be procured at the Santa Fe Farmers Market or through mail order sources such as The Chile Shop in Santa Fe 505-983-6080 or the Santa Fe School of Cooking (santafeschoolofcooking.com). If you cannot locate, you can substitute other pure chile powders such as Ancho, Pasilla or a pure New Mexico Chile Powder. Don’t use the grocery store concoction labeled simply chile powder as it is actually a blend of different spices.

Serves 6-8

1 ¼ c olive oil
2 T plus 2 tsp jalapeno chile powder
2 T Chimayo chile powder
3 T chopped garlic
1 T kosher salt
1 tsp freshly ground black pepper
2 tsp red pepper flakes
2 T fresh lime juice

3 red onions, cut into quarters and separated into pieces (optional)

3 pounds beef Loin Flap (skirt steak) cut into large sections (. Flank steak can be substituted but the results won’t be quite as good

A dozen or so corn tortillas

Guacamole or homemade salsa as an accompaniment

In a glass bowl stir together first 8 ingredients. Place meat and onions if using in zip lock bags and pour marinade over dividing between bags as necessary. Seal bags and massage the meat so it’s evenly covered with the marinade. Cover and refrigerate for up to 24 hours.

When ready to cook, remove meat from refrigerator and allow to come to room temperature. Prepare a fire in a charcoal grill and when coals are ready, grill meat and onions over direct heat. The meat will only take a couple of minutes per side for medium rare. The onions may take a bit longer so remove the meat and tent with foil while the onions finish cooking.

Warm the tortillas on the grill or in a hot cast iron pan. Slice the meat thinly across the grain at a slight diagonal. Chop the onions slightly.

To serve allow guests to make tacos with meat, onions, guacamole and salsa.

Wednesday, July 14, 2010

From Mac 'n Cheese to Haute Cuisine


As a young child, my daughter Hayley was like most kids, a picky eater. Her repertoire consisted of macaroni and cheese (preferably the cartoon shaped pasta out of a box), broccoli (thank god!), pasta with butter (no parmesan!), scrambled eggs and pizza – no sauce. I was a very accommodating cook who had suffered through the "eat what's put in front of you" strong arm feeding style of my parents. Hayley's pediatrician assured me that she was getting plenty of protein and with the help of Gummi vitamins she was a well nourished and thriving child. So I went on boiling pasta and making countless pb & j sandwiches for lunch.


To my delight, during a month long road trip when she was about 12 years old, the Children's Menu finally got old. To my horror she now wanted to order filet mignon and other premium menu items. Not wanting to curb her enthusiasm we indulged her menu choices and encouraged her to try new things. The more she tried, the braver she became about unfamiliar ingredients-- to the point that she would give almost everything a fair chance—even foods most of us would immediately shun. Chocolate covered cuttlefish is one example of just how far she'll go.


On a recent Spring Break trip to Northern California Devon, Hayley and I had reserved a table at Alice Waters' Chez Panisse in Berkeley. The entire meal was heavenly. It was clear from the moment we sat down that my daughter had become a foodie right before my very eyes. She was just as excited as we were to read the menu and ponder what to order. When the waiter presented Hayley a simple salad of spring greens dressed with a light vinaigrette her eyes lit up. One taste and I thought she might cry until I saw her satisfied smile appear and she exclaimed "this is the best salad ever!"


Anthony Bourdain lists vinaigrette as something everyone should know how to prepare. Now you too can check that one off your list.


Chez Panisse Vinaigrette - Alice Waters, The Art of Simple Food


1 tablespoon red wine vinegar


Salt


Fresh-ground black pepper


3 to 4 tablespoons extra-virgin olive oil


Pour red wine vinegar into a small bowl.


Add the salt and pepper


Stir to dissolve the salt, taste, and adjust if needed. Use a fork or small whisk to beat in the extra-virgin olive oil, a little at a time.


Taste as you go and stope when it tastes right.


Variations:


Add a little pureed garlic or diced shallot, or both to the vinegar.


White wine vinegar, sherry vinegar or lemon juice can replace some or all of the red wine vinegar.


Beat in a little mustard before you start adding the oil.


For part of the olive oil, substitute a very fresh nut oil, such as walnut or hazelnut.


Heavy cream or creme fraiche can replace some or all of the olive oil.


Chop some fresh herbs and stir them into the finished vinaigrette.


Monday, July 5, 2010

Pizza and Parenting

In his new book Medium Raw, Anthony Bourdain argues that basic cooking skills are a virtue and that learning to feed oneself, and others, with proficiency is a moral imperative--“as vital to growing up as learning to wipe one’s own ass, cross the street by oneself or be trusted with money.”

He goes on to suggest a few things that every man, woman and teenager should know how to do:

  • Chop an onion. Basic knife skills are a must
  • Roast a chicken (well)
  • Cook an omelet
  • Grill a steak, and rest it properly
  • Make a great vinaigrette (subject of a future blog post)
  • Shop for fresh, seasonal produce

And so on...


We’d add one thing to the list. Our kids should learn how to barbecue a great pizza.

Between us we have two in college and one about to venture out on her own. They don’t quite believe us when we advise them,that the quickest way to win friends and influence people is with a great meal, artfully prepared. When the meal can be done on a budget, all the better.

The math alone should point our starving college kids toward learning this art as they compare a soggy, limp and greasy $25.00 pepperoni pizza from the local Domino’s to what $8.00 wisely spent at the Farmers Market and a couple cups of flour will net you.


Pizza Night is tradition at Trinity, usually falling toward the end of the second week. We dig out the carefully wrapped sage leaves from the bottom of the produce drawer, give the basil plant we’ve brought with us from Trader Joe’s a haircut, and drag out the leftover grilled veggies from previous meals. Kathy whips up the dough by hand in the morning and at cocktail hour we fire up the grill and roll out the dough on the laminated dinette table.


The barbecue technique is courtesy of Bobby Flay who gave us the original dose of courage needed to throw raw dough on a hot grill.

One of this year’s favorite topping combos was inspired by Thomas Hill Organics, a great restaurant in downtown Paso Robles that features a wood burning stove in their outdoor patio. The other crowd favorite put good use to the hunk of pancetta that came in the “salty tasty pig parts” variety pack from Boccolone Salumeria that we had FedExed to the cabin (see, it’s really not camping).

We didn’t make the kids take notes while they watched but we are hoping for a phone call someday when they have a crowd of college friends coming over for dinner and need a fun, cheap meal idea. Then, we’ll point them to our blog and say, “See? I told you so!”

Basic Pizza Dough Recipe
2+ cups flour
2 teaspoons salt
1 cup warm water
1 pkg yeast
1/4 teaspoon sugar or a squirt of honey
1tablespoon olive oil
Mix together flour and salt, sprinkle yeast on top of warm water sweetened with either the sugar or honey. Let mixture sit for 10 minutes. Mix together wet and dry ingredients, add olive oil and knead for a 3 minutes. Add additional flour if necessary. At this point you can either let the dough rest for a few minutes, then divide it into 3 or 4 balls, depending on your pizza size preference and roll it out or place it in a covered bowl or ziplock baggie and refrigerate for up to 24 hours. Set out and allow the dough to get to room temperature, gently knead then divide and roll out.

Brush one side of the pizza round with olive oil and toss on a hot grill. The dough will firm rapidly and you'll want to pull it off the grill in 2 to 3 minutes when the bottom of the round is crisp and slightly charred. Top the grilled side with desired toppings and place back on the grill until toppings are as desired being careful to not burn the bottom of the pizza.

Pizza with grilled Meyer Lemons, Ricotta, Carmelized Onions, Sage and Honey

Inspired by Thomas Hill Organics

Makes one pizza roughly

2 Meyer Lemons

1 cup fresh Ricotta Cheese (use whole milk store bought if that’s all you can find)

A dozen fresh sage leaves

One large onion

High quality honey (we used wildflower honey)

Olive Oil

Fleur de sel.

One round of grilled pizza dough, partially prepared as directed above.

Slice onion thinly. Heat a couple tablespoons of olive oil in a sauté pan and cook the onions over medium-low heat until soft and carmelized (about 30 minutes). Can be done well ahead and set aside.

Slice Meyer lemons thinly (1/8-1/4 inch). Pick out seeds. Brush each side of the lemon slice lightly with olive oil. Grill slices on barbecue, turning as needed until lemons are lightly carmelized in appearance.

When ready to grill the pizza, brush the cooked side of a pizza round with a light coating of olive oil. Scatter carmelized onions evenly over the pizza. Arrange grilled Meyer Lemon slices on top. Dot spoonfuls of the Ricotta cheese over. Add the sage leaves. Finish with a sprinking of Fleur de Sel.

Place dough round back on the Weber and cook with the lid on until pizza is warmed and cheese is softened (about 3-5 minutes depending on how hot the grill is).

Remove pizza to board and drizzle with honey. Slice and enjoy. This one went well paired with Evolution 9 from Sokol Blosser, a fruity white blend.


Pizza with grilled Radicchio, Pancetta and Goat Cheese.

Makes one pizza roughly.

One head of Radicchio

3-4 ounces good quality pancetta such as from Boccolone

Fresh Goat Cheese, about 3-4 ounces

Olive oil

Kosher salt

Aged Balsamic Vinegar

Note: try to search out pancetta that isn’t already sliced. The beauty of this pizza is in the nice big lardoons of pancetta.

One round of grilled pizza dough, partially prepared as directed above.

Cut the radicchio into eighths through the core so that the leaves remain attached. Brush each side with olive oil and sprinkle with kosher salt. Grill wedges on barbecue until leaves are soft and blackened in spots. Set aside. Can be done an hour or so ahead of time.

Cut the pancetta into ½ inch chunks. Heat a tablespoon of olive oil in a sauté pan and cook the pancetta slowly over medium to medium low heat until crisp. Drain on paper towels. Can be done an hour or so ahead of time,

When ready to grill pizza, brush the cooked side of a pizza round with a light coating of olive oil. Place leaves of the radicchio evenly and generously over the pizza. Scatter the pancetta on top and dot the surface with spoonfuls of goat cheese.

Place dough round back on the Weber and cook with the lid on until pizza is warmed and cheese is softened (about 3-5 minutes depending on how hot the grill is).

Remove pizza to board and drizzle with the aged balsamic vinegar. Slice and eat.

Wednesday, June 30, 2010

Our Daily Bread


It has been a whirlwind of activity in The Trinity Alps. I’ve lost three games of petanque and six games of gin so far. I’m working on losing gracefully.

In the last couple of days, we’ve hiked to a waterfall, caught dozens of trout, read books, fought over the hammock, looked for glow worms and chased a fox in the dark.
Here’s Kathy’s report: I’ve won six games of gin and won one game of petanque. I’m working on winning gracefully.


Yesterday, Kathy baked two loaves of French bread which we enjoyed with cream cheese topped with chile raspberry jam from Santa Fe and a lovely, crisp gruner vetliner. She shares the recipe here, a wonderfully simple method. The dough comes together in the food processor and rises there for an hour. A quick shaping and baking and voila: Bread as pretty as you'd find in a bakery.

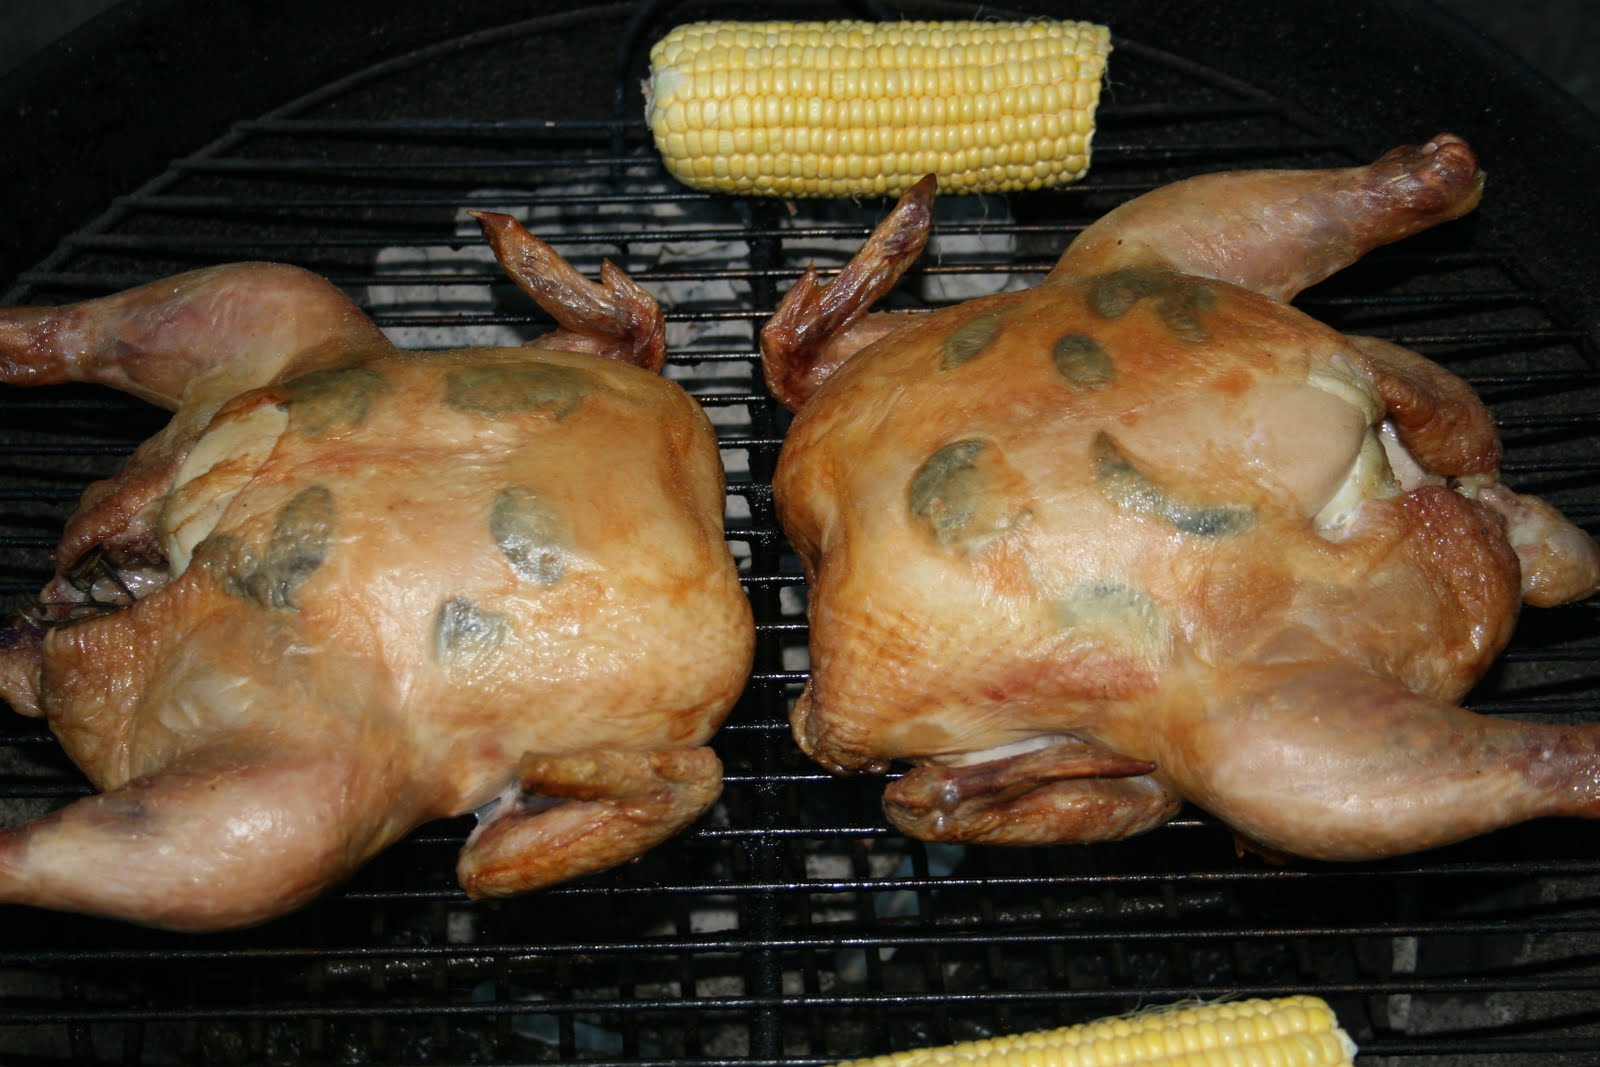
Dinner was something special. We attempted Judy Rodgers’ (of Zuni Café fame) roast chicken and bread salad. Of course we adapted the recipe for the Weber but the results were every bit as good. Even bread salad haters Mike and Juan had second helpings. Use mustard greens if you can find them. If not, a nice peppery arugula will do.


Zuni Chicken with Bread Salad (slightly modified)
2 chickens

For the bread salad: serves 2 generously
• Generous 8 ounces slightly stale open-crumbed, chewy, peasant-style bread (not sourdough)
• 6 to 8 tablespoons mild-tasting olive oil
• 1-½ tablespoons Champagne vinegar or white wine vinegar
• Salt
• Freshly cracked black pepper
• 1 tablespoon dried currants
• 1 teaspoon red wine vinegar, or as needed
• 1 tablespoon warm water
• 2 tablespoons pine nuts
• 2 to 3 garlic cloves, slivered
• ¼ cup slivered scallions (about 4 scallions), including a little of the green part
• 2 tablespoons lightly salted chicken stock or lightly salted water
• A few handfuls of arugula, frisee, or red mustard greens, carefully washed and dried

Directions
Seasoning the chicken (1 to 3 days before serving; for 3-¼- to 3-½-pound chickens, at least 2 days):
Remove and discard the lump of fat inside the chicken. Rinse the chicken and pat very dry inside and out. Be thorough-a wet chicken will spend too much time steaming before it begins to turn golden brown.
Approaching from the edge of the cavity, slide a finger under the skin of each of the breasts, making 2 little pockets. Now use the tip of your finger to gently loosen a pocket of skin on the outside of the thickest section of each thigh. Using your finger, shove an herb sprig into each of the 4 pockets.
Season the chicken liberally all over with salt and the pepper (we use ¾ teaspoon sea salt per pound of chicken). Season the thick sections a little more heavily than the skinny ankles and wings. Sprinkle a little of the salt just inside the cavity, on the backbone, but don’t otherwise worry about seasoning the inside. Twist and tuck the wing tips behind the shoulders. Cover loosely and refrigerate.
Starting the bread salad (up to several hours in advance):
Preheat the broiler.
Cut the bread into a couple of large chunks. Carve off all of the bottom crust and most of the top and side crust (reserve the top and side crusts to use as croûtons in salads or soups). Brush the bread allover with olive oil. Broil very briefly, to crisp and lightly color the surface. Turn the bread chunks over and crisp the other side. Trim off any badly charred tips, then tear the chunks into a combination of irregular 2- to 3-inch wads, bite-sized bits, and fat crumbs. You should get about 4 cups.
Combine about ¼ cup of the olive oil with the Champagne or white wine vinegar and salt and pepper to taste. Toss about ¼ cup of this tart vinaigrette with the tom bread in a wide salad bowl; the bread will be unevenly dressed. Taste one of the more saturated pieces. If it is bland, add a little salt and pepper and toss again.
Place the currants in a small bowl and moisten with the red wine vinegar and warm water. Set aside.
Roasting the chicken and assembling the salad:
Prepare charcoal grill to cook chickens using indirect heat. When coals are hot place chickens end to end and cook covered about one hour and ten minutes or until a meat thermometer inserted at the thigh reads 165.
Preheat the oven to 450°.
While the chicken is roasting, place the pine nuts in a small baking dish and set in the hot oven for a minute or two, just to warm through. Add them to the bowl of bread.
Place a spoonful of the olive oil in a small skillet, add the garlic and scallions, and cook over medium-low heat, stirring constantly, until softened. Don’t let them color. Scrape into the bread and fold to combine. Drain the plumped currants and fold in. Dribble the chicken stock or lightly salted water over the salad and fold again. Taste a few pieces of bread-a fairly saturated one and a dryish one. If it is bland, add salt, pepper, and/or a few drops of vinegar, then toss well. Since the basic character of bread salad depends on the bread you use, these adjustments can be essential.
Pile the bread salad in a 1-quart baking dish and tent with foil; set the salad bowl aside. Place the salad in the oven after you take the chickens off the grill giving them 10 to 15 minutes to rest.
Finishing and serving the chicken and bread salad:
Tip the bread salad into the salad bowl. (It will be steamy-hot, a mixture of soft, moist wads, crispy-on-the-outside-but-moist-in-the-middle wads, and a few downright crispy ones.) Add the greens, a drizzle of vinaigrette, and fold well. Taste again.
Cut the chicken into pieces, spread the bread salad on the warm platter, and nestle the chicken in the salad.

French Bread (from Epicurious.com)
• 4 cups unbleached all-purpose flour
• 1 1/2 teaspoons salt
• 1 teaspoon distilled white vinegar
• 2 teaspoons active dry yeast (from a 1/4-oz package)
• 1 2/3 cups warm water (105-115°F)
• 1 tablespoon olive oil

• Special equipment: 2 (17-inch-long) French bread pans (preferably dark nonstick); a razor blade or very sharp knife


Pulse flour, salt, and vinegar in a food processor to combine.
Stir together yeast and 1/3 cup water in a small bowl until yeast is dissolved, then let stand until foamy, about 5 minutes. (If mixture doesn't foam, discard and start over with new yeast.) With motor running, pour yeast mixture and remaining 1 1/3 cups warm water into flour mixture in processor, blending until dough forms a ball and pulls away from side of processor bowl, about 1 minute.
Cover processor feed tube and let dough rise until it fills bowl, about 1 hour. Pulse several times to deflate dough.
Generously oil bread pans with olive oil.
Turn out dough onto a work surface and divide in half (dough will be very soft). Press 1 half into a 10- by 8-inch rectangle and fold in the 2 short outer sides to meet in the middle, pinching edges together. Turn over (seam side down), then roll and stretch into a 15-inch-long irregular loaf. Put loaf, seam side up, in bread pan and turn to coat with oil, leaving loaf seam side down.
Repeat procedure with remaining dough. Let loaves rise, uncovered, in a warm draft-free place 30 minutes.
Put oven rack in upper third of oven, then put a large roasting pan with 1 inch of water in it on bottom of gas oven or on lowest rack of electric oven. Preheat oven to 450°F.
Make 3 shallow diagonal slashes down length of each loaf with razor. Bake loaves 30 minutes, then carefully remove pan of water from oven. Remove bread from pans and turn upside down on upper oven rack, then bake until golden and crusty all over, about 5 minutes more. Cool loaves on a rack.


Monday, June 28, 2010

Trout and Transformations


After 50 weeks of waiting, disappointment begins to set in as we realize the snow capped peaks and raging rivers will mean an absence of fly fishing and swimming this year. These are our two favorite activities (after eating and drinking).

Coffee Creek is unrecognizable as is the Trinity River, both rivers suffering a late spring run off. The tardy arrival of summer means the rivers will actually rise while we’re on our annual vacation, rather than drop. The first few quickly aborted attempts to fly fish give way to crushing defeat and frustration as we watch our flies rip downstream.

On a lark we decide to check the East Fork of the Trinity River, normally a slow trickle this time of year. I remember as a child catching several large rainbows there one wet year but since then, it has never yielded much.

Juan wades across the deep and swift channel and casts his line from a little sand bar mid-stream. On the first cast, a lunker gobbles his copper beaded nymph and the tone of the trip changes.

The run, it turns out, holds untold numbers of large lake trout. They are clearly congregating there while they wait for the river to subside so that they could swim upstream to spawn. Nearly every cast gets a hit and our arms, after 6 hours of fishing, are shaking with fatigue.

Three successful mornings in this wide flat run above the lake now represent the high water mark of all our fly fishing excursions.

One large trout, pictured here, takes Juan 15 minutes to land and he gratefully accepts a hand in netting him.


Like the normally humble East Fork, sometimes ordinary things can be transformed into something magical in the blink of an eye. Take ketchup. We share a mutual distain for the condiment. Can you say B O R I N G? But two additional ingredients and 90 seconds of work give it an extreme makeover.


Our evening menu called for hamburgers and potato salad which at first blush may seem unimaginative. However the marriage of chipotles in adobo along with the lowly ketchup produces a burger topping that turns pedestrian into gourmet.


This recipe from Bon Appetite pairs burgers with sharp cheddar, balsamic grilled onions, vine ripened tomatoes, fresh spinach leaves and the deliciously adulterated ketchup.


Cheddar Burgers with Balsamic Onions and Chipotle Ketchup

Onions:
1 pound red onions, cut crosswise into 1/3- to 1/2-inch-thick rounds
Olive oil
3/4 teaspoon coarse kosher salt
1/2 teaspoon coarsely ground black pepper
2 tablespoons balsamic vinegar

Chipotle ketchup:
1 cup ketchup
1 1/2 teaspoons chopped chipotle chiles from canned chipotles in adobo* plus 2 tablespoons adobo sauce from can

2 teaspoons (or more) balsamic vinegar

Burgers:
2 1/4 pounds ground beef (15% to 20% fat)
Coarse kosher salt
6 thick slices sharp cheddar cheese
6 large English muffins or hamburger buns, split, cut sides grilled
6 tomato slices (optional)
2 cups fresh spinach leaves

For onions:
Prepare barbecue (medium-high heat): Arrange onion rounds on baking sheet. Brush with oil; sprinkle with 3/4 teaspoon coarse salt and pepper. Transfer onion rounds (still intact) to grill rack; close cover. Cook until grill marks appear, about 4 minutes per side. Reduce heat or move onions to cooler part of grill. Close cover; cook until onions are tender, about 10 minutes. Transfer to medium bowl. Toss with vinegar. DO AHEAD: Can be made 3 days ahead. Cover; chill.

For chipotle ketchup:
Mix ketchup, chiles, adobo sauce, and 2 teaspoons vinegar in small bowl. Season with salt and more vinegar, if desired. do a h e a d Can be made 3 days ahead. Cover and chill.

For burgers:
Shape beef into six 1/2-inch thick patties. Sprinkle patties on both sides with coarse salt and pepper. Prepare barbecue (medium-high heat). Place burgers on grill. Close cover; cook burgers until bottoms start to darken and juices rise to surface, about 3 minutes. Turn burgers; cook to desired doneness, about 3 minutes longer for medium-rare. Top with onions and cheese. Close cover; cook until cheese melts. Place muffin bottoms on plates; spread with ketchup. Top with burgers, tomatoes, if desired, spinach, and muffin tops. Serve, passing remaining ketchup separately.