Sunday, December 12, 2010
Of Criminals and Crabs
I remember him sitting in the driver’s seat of the Buick Station Wagon as its big V8 engine idled, a cigarette dangling from his fingertips. As my brother and I crept forward in the darkness and looked back at him for reassurance we could see only the Salem’s embers glowing as he inhaled.
“Hurry up!” he’d hiss. And onward we’d scurry, hearts pounding, palms sweaty.
We’d hurl the heavy garbage bags of bloody entrails into the neighborhood park’s dumpsters, turn on our heels and run back to the safety of his car. It seemed like miles of ground to cross between the dumpster and the Buick. I was scared to death and sure that the cold firm hand of a policeman would clutch the back of my collar before I could throw myself into the back seat and lock the car door.
The dirty deed done and The Law averted, my Dad would peel out and race for home, quickly finishing the rest of his secret smoke before rejoining polite society.
“How’d it go?” my sweet mother would ask as she greeted us at the door. I couldn’t help but feel deep shame that all of us, even my gentle mom, were a part of this dark family secret. We’d been doing it for years and I knew it was wrong. But there was no stopping my dad, who insisted his kids come along for the ride each time, miniature henchmen to do his bidding.
My dad loved to fish for albacore and my mother liked clean trash cans.
Forty years ago the annual albacore runs offshore in San Diego were bountiful and my dad and his buddies would come home from overnight charter trips with dozens of big tuna. They’d divide up the catch and we kids would watch my dad skillfully clean his share as the coals in his Weber turned grey.
Dinner over, an impassioned conversation would invariably ensue between my mother and my father about how many days it would be until Trash Day. And invariably, if it was further into the future than the next morning, my mother would demand a midnight run to the park so that her trash cans wouldn’t be sullied by fishy odor.
Once their little juvenile delinquents had stealthily deposited the smelly fish guts into the Kate Sessions Park dumpsters, domestic bliss would be restored in our home.
I recalled these furtive outings as I stood over my kitchen sink the other night cleaning Dungeness Crabs. As I dropped the gills and shells and goopy viscera into a plastic garbage bag, I couldn’t help but silently calculate how many days until Trash Day. I didn’t make a nocturnal run to the nearest public dumpster but I did avoid lifting the lid of our outdoor bin for the remainder of the week.
It’s crab season right now and our local fishmonger was advertising strong supply and low prices--$4.95 per pound for live ones. So, Kathy and I cooked up a batch last weekend and served them with our favorite dipping sauce, a rich, spicy-sweet chile butter.
There’s no excuse for buying the crabs already cooked. It’s the easiest thing in the world to boil up a batch. I cleaned all eight in under 10 minutes, ripping off the legs and claws while Kathy, at the other end of our two person assembly line, partially cracked each piece and tossed the parts into a big serving bowl.
The crab was still warm when we served, accompanied by Caesar Salad and a couple of homemade baguettes.
Dungeness Crabs with Chile Butter
We usually buy one crab (1.5 to 2 pounds each) per person. Keep them on ice in an ice chest until you are ready to cook. Don’t keep them in a plastic bag—they don’t breathe much when they are on ice but they do need some air! The chile butter is divine. You’ll never go back to simple melted butter.
Bring a large pot (or pots depending on how many crabs you are cooking) of well salted water to a rolling boil.
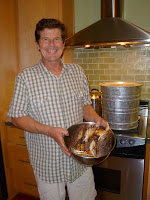
Banish any squeamish dinner guests from the kitchen and drop the live crabs into the boiling water. Cover pot with lid and boil for 20 minutes. Crabs will turn deep orange when they are done.
After 20 minutes, dump the crabs into the sink and clean them as soon as they are cool enough to handle. There are ample directions on how to clean crabs on the internet. Here’s a quick recap from the Oregon Dungeness Crab Commission.
http://www.oregondungeness.org/cleaning.shtml
To serve, break off the legs and claws, give them each a quick crack with a crab cracker or nutcracker and toss them in a big serving bowl. Break each crab body in half and add to the bowl. Serve family style with a crab cracker and pick for each person.
Chile Butter
Each pair of dinner guests can share a ramekin of chile butter. This recipe makes plenty for about 8 crabs.
Melt three sticks of unsalted butter over low heat in a small saucepan. Spoon off the solids that rise to the top and discard.
Add:
2 Tbsp. ancho chile powder
4 tsp. brown sugar
2 tsp. kosher salt
1 ½ tsp. ground cumin
1 tsp. dried oregano
½ tsp. cayenne
The chile butter can be made a couple hours ahead and reheated gently. Right before serving, divide the melted butter into 4 -5 little ramekins, ensuring that the ground spices are evenly divided among them.
Dip each succulent bite of crab into the butter, stirring up some of the spice. Eat. Enjoy. Bibs optional.
Sunday, December 5, 2010
Pan Envy
Kathy’s and my shared culinary history is littered with them. They are the fail safe recipes we turn to time and time again until our husbands beg us to stop. There was the Chicken with White Wine, Proscuitto and Rosemary ladled over polenta that we made every ski trip. There was the Bobby Flay Grilled Tomato Bread Salad that wowed our summer dinner guests and repulsed our husbands. Chipotle Macaroni and Cheese has been the star at many a dinner buffet over the years. And as detailed in a previous blog post, one of us seemed to serve Café Pasqual’s Carne Asada at a dinner party almost weekly there for awhile. The recipes are so entwined in joint gatherings that we lose sight of who discovered it originally.
Then Kathy got a paella pan for Valentine’s Day. Later, a photo of her proud, smiling face posed over a steaming pan of the Valencian dish appeared on her Facebook page. Not only did she have a paella pan, I hadn’t been invited to its inauguration. A big guilt trip prompted an invite a few weeks later and a mild case of desire blossomed into full blown pan envy.
Paella meets all the requirements for the go-to meal. It’s visually stunning, impressive in presentation. Most of the prep work can be done ahead and the dish simmers stovetop while the cook relaxes with friends. The only challenge can be finding bomba rice and good Spanish chorizo locally.
I’m hoping Santa remembers to add those two ingredients to his shopping cart while he’s ordering my pan.
Mixed Paella (Paella Mixta)
Source: Saveur Magazine
30 threads saffron, crushed (a scant 1⁄2 tsp.)
1 lb. boneless skinless chicken thighs,
cut into 2" pieces
10 large shrimp, peeled and deveined
Kosher salt and freshly ground black pepper,
to taste
1⁄2 cup extra-virgin olive oil
4 oz. dry-cured Spanish chorizo,
cut into 1⁄4"-thick coins
1 tbsp. smoked paprika
3 cloves garlic, minced
3 dried bay leaves
3 medium tomatoes, minced
1 small onion, minced
7 cups chicken broth
2 1⁄2 cups short-grain rice,
preferably Valencia or bomba
1 9-oz. box frozen artichoke hearts, thawed
8 oz. fresh or frozen peas
3 jarred roasted red peppers,
torn into 1⁄2"-thick strips
12 mussels, cleaned and debearded
1. Put saffron and 1⁄4 cup hot water in a small bowl; let sit for 15 minutes. Season chicken and shrimp with salt and pepper. Heat oil in a 16"–18" paella pan over medium-high heat. Add chicken, shrimp, and chorizo and cook, turning occasionally, until browned, about 5 minutes. Transfer shrimp to a plate, leaving meats in pan. Add paprika, garlic, bay leaves, tomatoes, and onions to pan and cook, stirring often, until onions soften, about 6 minutes. Add reserved saffron mixture and broth, season with salt, and bring to a boil over high heat.
2. Sprinkle in rice, distribute evenly with a spoon, and add artichokes, peas, and peppers. Cook, without stirring, until rice has absorbed most of the liquid, 10–12 minutes. (If your pan is larger than the burner, rotate it every two minutes so different parts are over the heat and the rice cooks evenly.) Reduce heat to low, add reserved shrimp, and nestle in mussels hinge side down; cook, without stirring, until mussels have opened and rice has absorbed the liquid and is al dente, 5–10 minutes more. Remove pan from heat, cover with aluminum foil, and let sit for 5 minutes before serving.
SERVES 6 – 8
Sunday, November 14, 2010
The Dangers of Being a Locavore
San Luis Obispo County is a rich agricultural region. We’re friends with farmers and ranchers. Our Morro Bay fishmonger announces weekly in an email blast which boat and which captain, exactly, offered up this week’s Sea Bass. The wine we drink is made by friends and neighbors. FFA is big here so someone’s kid is always raising a hog or sheep for the Mid State Fair, then desperately seeking a buyer for the fair’s last day auction. My pantry holds locally made honey, olive oil, chipotles and wheat bread. It’s easy to live within our culinary means here.
But I did perhaps take the locavore concept a bit too far last spring when I bought a baby goat.
During one of my weekly Saturday morning chats with the artisan cheese-and-pasture chicken guy at Farmers Market he revealed that he also sold Spring lambs and goats to a lucky few each year. I immediately reserved a goat, thinking I’d convince a few fellow carnivores to try goat tacos during the summer.
I never actually met the goat but I felt like I got to know him. Each week I asked Mr. Cheese and Chicken Guy if my goat was ready. “No, he’s not ready yet,” he’d reply. And then he’d add a just enough of a reason that I began to wonder if this was such a great idea. “He’s only about this big,” he’d say while holding his hands apart by about the length of a Yorkshire Terrier. “He’s still sleeping in a big ole pile with his brothers and sisters.”
Finally one Saturday in September, Mr. Cheese and Chicken Guy flagged me down at Farmers Market and said my baby goat had an impending date with the butcher. I made arrangements to pick him up ---frozen and in a box-- a few weeks later at the man’s Santa Margarita ranch and started researching recipes for Mexican Birria.
On the big day, Kathy and I drove out to the ranch. Beautiful, billowy thunderheads gathered over the oak studded hills, the windy, narrow road twisting through golden pastures. We were met at the door by the rancher’s wife, the cheesemaker herself, who immediately offered to give us a tour so we could see where my goat came from.
We saw the sheep she sheared for wool, the milk goats and the heirloom pig that would soon fill her own freezer. Then we entered a large fenced pasture where a dozen young goats scampered around. One goat, larger than the rest, took a quick interest in Kathy and me, nibbling at our jackets, butting our thighs, rearing up on us and generally becoming a goaty nuisance. I said, “He’s the one that should have gone to the butcher!” and was told that he was my goats brother. Suddenly I didn’t feel so much like the grim reaper.
In the middle of the grassy pasture we were standing in was a small portable corral, about 15’ by 15’ and fenced with wire meshing about 3 feet tall. Inside the corral were 30 white chickens who cackled and pecked and fluttered about. These were the lovely chickens I’d been buying at farmers market for the last year that actually tasted like chicken. They had firm flavorful meat in stark contrast to a colorless and mushy grocery store bird.
One had escaped the pen and was running clockwise around the outside, squawking in panic and missing his friends. The rancher’s wife started to run after him to no avail. She pointed at Kathy and ordered her to start walking counterclockwise around the pen so the chicken could be caught between them.
As they closed in on the escapee, it dashed straight toward Kathy. “Catch it!” the rancher’s wife shrieked. Kathy, ever the good sport, lurched forward, reached out with two hands and grabbed the bird just as it threw itself into the wire fencing. A second loud shriek, this time from Kathy, pierced the country air and she threw up her hands and leaped back. The fence, it turned out, was electrified. Kathy looked at me, her eyes wide, and gasped. The charge had gone straight through the chicken and bolted her right out of her bucolic reverie.
While I’d like to be able to say that I, ever the empathetic friend, tended to her obvious distress I cannot. Instead I must admit I was convulsed with laughter to the point I can’t even remember driving home. It’s still a bit of a sore subject.
This recipe for Goat Birria adapted from one by Rick Bayless is pretty authentic according to my research. The chile sauce is time consuming but worth it. It’s a brilliant, rich red and tastes of pure chile. It would be great on lamb or pork if you don’t find yourself with a freezer full of young goat like I did. Even if you don’t try this recipe, commit the technique for the garlic to memory as the cloves roasted in this manner would improve many recipes calling for garlic.
As is our habit we forgot to take a photo of the finished dish. I blame the wine.
Birria de Chivo o de Carnero
Slow steamed Goat or Lamb with mild chile seasoning.
We served this meat up taco style in warmed corn tortillas with sliced radish, lettuce and crumbled cotija cheese.
Ingredients
o 1 (5 lb) pieces young goat meat, perferably a hind quarter or one 3 pound
bone in lamb roast from the shoulder or butt-end of the leg
o 12 large chiles guajillos, stemmed,seeded and deveined
o 6 cloves garlic
o 3 teaspoons cider vinegar
o 1/4 tablespoon ground cumin
o 3/4 teaspoon ground black pepper
o 1 teaspoon salt
o 2 teaspoons sugar
o 1 large ripe tomatoes, roasted,peeled and cored or a 15 oz can of tomatoes,
drained
o 1 teaspoon oregano ( mexican if you can find it)
o 1/2 teaspoon salt
o 1 small onions
o 3 teaspoons fresh coriander
o 2 small limes
Directions
1. The Meat: Trim most of the fat from the meat.
2. If it is a goat hindquarter cut into 2 pieces, severing it through the joint
at the top of the leg.
3. Place in a large, noncorrosive dish.
4. The Chile Marinade: Heat a griddle or heavy skillet over medium heat.
5. Tear the chiles into flat pieces and toast them a few at a time, pressing
them against the hot surface until they crackle and blister, then flip them
over and repeat. Be careful not to burn or they will turn bitter.
6. Cover with boiling water, weight with a plate to keep them submerged and
soak 30 minutes.
7. Roast the garlic on the hot griddle until black on the outside, soft in
middle.
8. Cool and peel.
9. Drain the chiles and place in a blender jar with the garlic and vinegar.
10. Add the cumin, pepper and salt and 3/4 cup water.
11. Blend until smooth-then strain.
12. Remove 1/2 cup, stir in the sugar, cover and set aside for the final glazing.
13. spread the rest of the chile paste over the meat, cover and refrigerate for
at least 4 hours or, preferably, overnight.
14. Slow steaming: Preheat the oven to 325.
15. Ser a roasting rack into a deep, wide stockpot with a tight fitting lid.
16. Make sure the rack is 1 inch off the bottom. If it isn’t rest the rack on
custard cups.
17. Measure in 3 cups of water then lay the marinated meat on the rack and
spread any remaining marinade over it.
18. Bake for 3 hours.
19. Finishing the broth: take off the lid; then carefully remove the tender meat.
20. Take out the rack, spoon the fat off the broth and then measure it.
21. You need at least 1 quart-if necessary, add water to bring it to that level.
22. Pour the broth into a small saucepan.
23. Puree the tomato in a blender or food processor, add it to the broth along
with the oregano, cover and simmer over medium low heat for 20 minutes.
24. Season with salt.
25. Glazing and serving the birria: Shortly before serving, remove the bones,
large pieces of gristle and excess fat from the meat, keeping the pieces of
meat as large as possible.
26. Set the meat on a baking sheet, brush lightly withthe reserved chile paste
glaze, then bake for 10 minutes to set the glaze.
27. Either present the meat on a large platter and pass the warm broth
separately, or slice the meat across the grain and serve it in deep
plates, awash in the broth.
28. Mix the onion and cilantro, and pass the lime at the table.
Monday, October 25, 2010
Wabbit Season
“Rabbit??" Mike replied with his brow furrowed after I told him what Devon and I were preparing for Saturday night’s dinner. “Are you opposed?” I asked. He claimed he wasn’t, but I knew exactly what he was thinking. I could almost see the image of Coco (aka Mr. Wiggles) in a thought bubble over his head.
Coco is our octogenarian rabbit.
We acquired him during a live auction at a fundraiser for a local preschool. The bidding started at $5. But for some reason no one placed a bid. Of course by that time in the evening I’d had a few glasses of wine. So, when they asked plaintively if someone would please give the bunny a home my arm shot up. After all, he was so cute! He came with a cute little bunny hutch complete with a crock for food and a bottle for water. Plus, I reasoned to myself, we had a 10 year old at home who would love to have a bunny.
It turned out the bunny needed a new home because he wasn’t very friendly. To make a long story short, for the past 8 years Mike has been the primary care giver for Coco. As far as we know he is at least 10 years old. He is now blind and deaf. The little guy holds a special place in Mike’s heart. A sort of a kinship has formed between the two of them; both male, both senior citizens. I couldn’t blame Mike for his initial reaction given their bond.
.
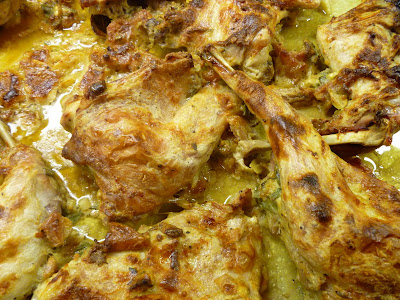
Luckily, when presented with a succulent plate of Chez Panisse chef David Tanis’s Rabbit in Mustard Sauce the furrowed brow had disappeared and an expression of anticipation had replaced it. He even managed seconds
We served our wabbit, as we had taken to calling it teasingly to Mike, with classic potato gratin and a spinach cake.
Here’s the Rabbit in Mustard Sauce Recipe we acquired from Sauver.com, which by the way, is a great magazine with a website that we highly recommend.
http://www.saveur.com/article/Recipes/Rabbit-in-Mustard-Sauce
Monday, September 27, 2010
Labor of Love
“Croutons?” she said. “You make your own croutons?”
I explained that my friend Kathy had asked me to supply Caesar Salad for a surprise going away party that weekend for her daughter Hayley. Caesar Salad for fifty, mind you.
My co-worker shook her head and laughed. “I didn’t even know there was such a thing as a homemade crouton. I don’t think I’ve ever had one,” she added with a note of wistfulness.
“It’s a real labor of love.” I told her.
Hours later, my trusty Dansko clogs no longer assuaging the ache in my feet, I wrapped a twist tie around the final bag of golden, garlicky, crunchy cubes of sourdough. My stove top was covered with tiny crumbs and I was long past ready to call it a night.
As I looked at the huge bags of croutons mounded on top of my kitchen island I reflected that my efforts were well worth it because the guest of honor had requested my salad specifically. I’d thought briefly about taking a shortcut and finishing the croutons in the oven but knew the results wouldn’t be the same. A long, slow stir in a cast iron frying pan was the only way to ensure each batch was worthy of my dad’s Caesar Salad recipe.
Some of my friends express their love in similar ways.
Take Tim, for instance.
After long days of tending clients’ gardens he can be found in his own back yard, watering, weeding, hoeing and planting. Seeing his number pop up on Caller ID usually means one of two wonderful things: I’m either about to be invited to a transcendent meal he has prepared featuring the fruits (and vegetables) of his labor in the garden. Or, he’s on his way over to bring me a plastic grocery bag stuffed with still quivering salad greens plucked that morning from his hallowed ground. The bonus is that they are already washed and layered neatly with paper towels. My work week is instantly easier because he has been so thoughtful.
My husband’s pals know he has an insatiable sweet tooth. Those that know him best also know that German Chocolate Cake is his all time favorite. So when Nancy made Juan a three layer beauty one year on a joint vacation, he was touched. Kathy and I realized what a true labor of love it was because she pulled it off in something akin to an Easy Bake oven in the cabin’s 80 square foot hot, stuffy kitchenette while the rest of us were lounging streamside in hammocks.
A work colleague, Sandy, makes bourbon balls every year for Christmas gifts, somehow squeezing the task into a 70 hour work week.
Then there’s Rye who religiously tends his sourdough starter, feeding it weekly so it doesn’t die. I tried his technique for a few weeks this summer and it was as if I had a squalling baby in the house such was my guilt when I was too lazy to feed my batch as it required.
When we are lucky our love of food and cooking makes others happy. Sometimes how it makes us feel is enough. The Monday after Hayley’s surprise party I showed up to work early with a baggie of croutons for my co-worker and placed them on her desk. Her reaction to this simple gift makes me smile still.
Patton Family Caesar Salad
Serves 6 as a side or starter. 3-4 as an entrée.
The croutons are the labor of love in this recipe. While it’s much quicker to bake them in the oven, this method yields superior results. You can’t go watch TV while they cook this way or they will burn when you ultimately forget about them. You’ll be tethered to the stove for at least 90 minutes, stirring them every 10-15 minutes or so.
If you are hesitant about eating nearly raw eggs, skip this recipe entirely. It’s not the same without them.
One 1 lb. loaf good quality sourdough bread, cut into cubes about ¾” to 1” square.
(you should have about 7-8 cups bread cubes)
4 Tblsp. olive oil
6 hearts of Romaine, well trimmed, leaves separated, washed and dried.
2 big fat cloves of garlic, peeled
Juice of 2 lemons—about ¼ cup. (or more to taste)
¼ tsp ground mustard
2 healthy glugs of Worcestershire sauce
Freshly ground pepper—about 10 grinds from a mill
1/8 tsp kosher salt
1 can anchovy filets
½ to ¾ cup olive oil
2 eggs
¾ cup freshly grated parmesan cheese (or more to taste)
Croutons:
Heat 4 Tblsp. olive oil over medium heat in a large frying pan (preferably cast iron) until almost smoking. Add bread cubes, tossing quickly until evenly coated with the olive oil. Turn heat to low and cook, stirring frequently, until croutons are golden brown and crisp, about 1.5 hours. Just before you declare them done, smoosh one of the garlic cloves in a press and scrape all of the pulp into the pan. Toss over heat for about a minute allowing all of the croutons to come in contact with the sizzling garlic.
Turn the croutons into a bowl and set aside while you make the salad. If you make them ahead of time, store in an air tight container after they cool.
Coddled Eggs:
Bring a small saucepan of water to a boil. Gently lower the eggs into the water and boil for exactly one minute. Remove the eggs and set aside.
Dressing:
Mince one of the garlic cloves in the food processor. Scrape down the bowl. Add the next 5 ingredients. Pulse to blend. With the motor running, add the olive oil in a slow stream until emulsified. Taste the dressing when you’ve added a ½ cup then continue adding the additional ¼ cup until the acidity of the lemon juice is balanced to taste. The dressing should be fairly tart.
Shortly before tossing the salad, separate the anchovy filets and drop them into the processor bowl. Pulse just enough to chop the anchovies into small pieces. Be careful not to completely pulverize or incorporate them.
Assembling the Salad:
Tear the lettuce into small pieces and put in a large salad bowl. The bigger the bowl, the better, as this salad needs lots of assertive tossing.
Crack the eggs over the lettuce and scoop out any cooked egg white with a spoon, adding to the salad. Toss the lettuce well, ensuring the leaves are evenly coated with the egg.
Pulse the dressing one last time and pour about two thirds of it over the salad. Toss well and taste, adding more dressing as desired. If you don’t use all the dressing ensure you scoop out the anchovy bits from the bottom of the processor bowl. Toss well again. Taste again for seasoning.
Add the parmesan and toss again.
Finally, add the croutons, toss one last time and serve.
Sunday, September 12, 2010
Looks aren't everything, but....
Lately rabbit has been appearing on big city restaurant menus. It is a delicious white meat, mild in flavor, which can be used in most recipes that call for chicken or veal. If it makes an appearance on a menu I’m inclined to order it simply because it isn’t chicken or veal. Chicken always seems a bit boring if you’re dining out – unless of course you happen to be at Zuni Cafe. Veal is still boycotted in my family for humanitarian reasons.
When I saw rabbit had made it to the menu of a favorite local restaurant – braised rabbit no less -- I jumped at the chance to try it. It was served atop a delicious corn cake with a delicate sauce and…what else? I couldn’t tell you. The entire dish has been purged from my memory and here’s why: It looked like canned albacore tuna, all light and flaky on top of a corn cake. Try as I might to enjoy the subtle flavors of the dish, the visual was too much for me. With each bite, the anticipation of tasting tuna killed it for me. Don’t get me wrong, I like a good tuna sandwich as much as the next guy but I wanted rabbit on my corn cake! I couldn’t get past it.
Maybe you can’t judge a book by its cover but when it comes to truly enjoying a good meal, a key ingredient is the visual appeal of the dish. Café Pasqual’s does a great chicken recipe called Pollo Pibil. My daughter has always called it Lobster Chicken because of the beautiful orange color the achiote paste imparts on the chicken. The accompanying Saffron Rice is a beautiful rich yellow and enhances the taste and visual presentation of the Pollo Pibil.
Adapted from Café Pasqual’s Cookbook
Some day I’m going to find a big, beautiful, freshly butchered rabbit to use in place of the chicken in this dish!
For the chicken:
4 teaspoons cumin seeds
1 cinnamon stick
1 teaspoon cloves
1 ½ tablespoons black peppercorns
½ cup achiote paste
3 tablespoons kosher salt
2 tablespoons minced garlic
2 cups fresh orange juice
½ lime juice
2 tablespoons fresh marjoram leaves or 1 tablespoon dried marjoram
½ cup olive oil
6 chicken breast halves or a mixure of breasts and thighs.
Combine cumin, cinnamon and cloves in a dry sauté pan and roast over medium heat until fragrant (about 2 minute). Cool and grind in a spice mill or coffee grinder until fine.
Combine remaining ingredients – except the chicken – in a blender, process to incorporate.
Place chicken in a large ziplock baggie, pour in marinade and refrigerate for at least 24 hours and up to 36 hours.
Cook chicken on a charcoal grill.
1 teaspoon saffron threads
¼ cup olive oil
½ white onion, minced
1 ½ teaspoons minced garlic
1 ½ teaspoons kosher salt
2 cups long grain white rice (this is one recipe that I do use white rice in just because it looks better than when made with brown rice)
3 cups water
Combine olive oil, onion, garlic, salt, and white pepper in the bottom of a large saucepan. Cook over medium heat for 2 minutes. Add rice and sauté for 2 minutes.
Add water, then saffron and bring to a boil. Reduce heat to low, cover and simmer 20 – 30 minutes until rice is tender.
Serve with a big green salad.
Monday, August 30, 2010
Don't Cry For Me Argentina
“Are you sure you want to have a big dinner party on Saturday?” I typed.
But I knew what her answer would be before it landed in my inbox.
“Yes. I need to stay focused,” She wrote.
I knew because it was the same answer I would have given.
The simple truth of cooking is that it’s not always a means to an end. The act itself is what we seek.
In The Solace of Open Spaces, author Gretel Ehrlich writes of the healing power of the vast Wyoming landscape. She’d moved there after suffering a personal tragedy and found to her surprise that backbreaking ranch work woke her up rather than dulled her senses as she’d hoped. “The vitality of the people I was working with flushed out what had become a hallucinatory rawness inside me. I threw away my clothes and bought new ones; I cut my hair. The arid country was a clean slate. Its absolute indifference steadied me.”
This weekend my friend’s succor would be found closer than the red-earthed mesas of a high desert.
“Are you sure I can’t bring something?” I asked.
“I’ve got it covered. I roasted beets last night for empanadas.”
I pictured her in her yellow kitchen rolling out empanada dough on a floured counter top, reaching over to gently stir the filling sautéing on the stove; cutting circles from the dough, stuffing the discs, pinching the edges, baking. The slow, methodical process rounding off the edges of her worry.
These days the paychecks don’t quite stretch two weeks. An aging parent asks me now, “Are you a neighbor?” And so, those quiet moments in the kitchen caramelizing onions, shelling favas, stirring risotto, corral my thoughts. The unhurried, familiar tasks point me inward and leave me centered.
On this morning, a husband’s pathology results didn’t arrive as promised, a beloved daughter was leaving too soon for a year abroad, a son’s wife was in labor an ocean away and a father with all his blustery presence was arriving for a visit in the morning.
“I need to cook.” She said, simply.
And I understood.
Later, the warm embrace of friendship around the dinner table, laughter. As we raise our glasses to that singular good fortune, warm empanadas waiting, we both say a silent toast to effort well spent and the solace of counter spaces.
This recipe for Swiss Chard, Beet and Goat Cheese Empanadas comes from www.laylita.com.
12 medium size or 20 small empanada discs
4 small beets, peeled, boiled until tender and diced
1 bunch of swiss chard, chopped
1 cup crumbled goat cheese
½ white onion, sliced
2 tbs olive oil
2 garlic cloves, crushed
1 tbs finely chopped fresh oregano
1 egg, yolk and white separated and lightly whisked
Salt to taste
Preparation:
- Heat the oil and sauté the onions and garlic for 3 minutes.
- Add the chopped swiss chard and cook for about 5 minutes, stirring occasionally.
- Remove from the heat, cool down and mix with the diced beets, crumbled goat cheese and chopped oregano.
- To assemble the empanadas spoon the stuffing on to the center of each empanada disc.
- Brush the inside edges of the empanada discs with the egg whites, this is will help them seal better and keep the filling from leaking while baking .
- Fold the empanada discs and seal the edges, use a fork to help seal the empanadas.
- Lightly brush the top of the empanadas with the egg yolk; this will give a nice golden glow when they bake.
- Chill the empanadas for at least 30 minutes, this will help them seal better and prevent leaks.
- Pre-heat the oven to 400 F and bake for 20-25 minutes or until golden.
- Serve warm with Creme Fraiche Sauce
Ingredients:
8 oz crème fraiche
1 medium sized bunch of mint, about ½ cup coarsely chopped
¼ cup coarsely chopped cilantro
¼ cup coarsely chopped parsley leaves
2 garlic cloves
1-2 serrano or other hot peppers, seeded
3 tbs lemon juice, about ½ lemon
Salt to taste
Preparation:
Place all of the ingredients in the blender and blend well, the sauce will be very liquid after you blend it, but if you return it to the refrigerator it will thicken.
If you can find frozen empanada discs in California - please let me know where. If like me, you live in an area where empanada discs are non-existent, here is a recipe also from Laylita that is delicious and flaky.
Empanada Dough
Ingredients for 15 medium size or 25 small empanada discs:
3 cups all purpose flour
¼ teaspoon salt
6 oz unsalted butter (1 ½ sticks), cold and cut into 12 pieces
1 egg
4-5 tbs water
Preparation:
- Mix the flour and salt in a food processor.
- Add the butter, egg and water until a clumpy dough forms.
- Form a ball and chill in the refrigerator for about 30 minutes.
- Roll out the dough into a thin sheet and cut out round disc shapes for empanadas (use round molds or a small plate).
- Use immediately or store in the refrigerator or freezer to use later.
Sunday, August 22, 2010
Blogs and Fog
One of these days we’ll figure out how to do captions and get all the fonts the same size. The other key thing we need to remember to do is to take a photo of the finished dish. By the time the cooking is done, we’re thinking about a glass of wine and we’d rather dig in than dig out the camera. Such is the case with the following recipe.
We’re noticing a trend beginning to emerge with Holy Mole and that’s a distinct proliferation of Latin inspired dishes. It must have something to do with the unrelenting fog here on the Central Coast that has plagued us this summer. So, we tend to take refuge in our food. The sunny colors of citrus, smoked paprika and dried chiles substitute for absent sunsets. A little heat on our tongues transports us to balmier locales.
Last night we attended a tenth anniversary party for some old friends and basked in warmth of a different kind.
As we drove up the coastal valley to the couple’s hilltop ranch, I wondered, “Who will I know?”
Later, as I perused the buffet table heaped with offerings made with love and well wishes I realized it didn’t matter. That evening I was reminded again and again of the unifying force of cooking as new friendships were forged through common ground. Kinship with strangers was quickly established: A playful debate over the proper temperature for a new york strip, the magical properties of true Chimayo chile, an oral recipe swap by firelight, ferreting out the secret ingredient in a perfect chocolate chip cookie.
When the full moon rose and the campfire faded we prepared to leave. Nearby, a new mother juggled infant twins. As we drove down back down the dusty road I wished for these babies that they are graced in life by friends who celebrate the warmth of these little moments.
These carnitas are warming and satisfying and if you can talk your partner into washing the dutch oven when it’s time to do the dishes you should consider yourself lucky. You’ll see in the photo an overnight soak might be in order. Fortunately, the results are well worth the dirty pan.
I’ve been making the accompanying Avocado-Tomatillo salsa all summer long. Its sunny zip compliments any taco perfectly and the leftovers are wonderful on eggs the next morning.
Tacos of Carnitas Roasted with Orange, Milk, and Pepper
Adapted from a recipe by Deborah Schneider
Amor y Tacos: Modern Mexican Tacos, Margaritas, and Antojitos
Schneider writes, “Pork cooked this way is moist and succulent, sweet from the natural caramelization of the milk, with the slightest hint of orange and black pepper. For an over-the-top garnish, crumble chicharrón (fried pork skin) on the soft roast meat for a porky, crunchy textural contrast.”
Serve the carnitas with warm corn tortillas, a raw tomatillo avocado salsa, and extra onions and cilantro if desired.
Serves 6
3 pounds boneless pork shoulder (butt) or boneless country pork ribs
1 tablespoon peanut oil, olive oil or lard
1/2 teaspoon salt
1 orange, well washed, cut in half
1 cup whole milk
About 2 cups water
1/2 teaspoon fresh-ground black pepper
Warm corn tortillas
Tomatillo-Avocado salsa, recipe follows
1. Preheat the oven to 350 degrees.
2. Cut the pork into 6 or 8 pieces. Heat oil or melt the lard in a heavy Dutch oven just large enough to hold the meat in one layer. Brown the meat on all sides and season with salt. If needed, brown the meat in batches, removing to a bowl as you rotate all the pieces in. Don’t overcrowd or the meat will steam instead of brown.
3. Squeeze the orange over the meat and toss the rind into the pan. Pour the milk over the meat and add enough water to almost cover the meat. Sprinkle with pepper. Cover tightly with aluminum foil and bake for about 2 hours, until the meat is fork-tender.
4. To finish, uncover the meat and break into into largish pieces. Remove the orange rind and discard. (note: I usually spoon some of the liquid off at this point if there’s a large quantity left in the pan) Roast, uncovered, until most of the liquid has evaporated, about 20 minutes, turning the meat with tongs occasionally to encourage even browning. Cook until the meat is brown and crisp on the edges.
5. To assemble the tacos, fill a warm tortilla with shredded pork. Top with avocado tomatillo salsa, a little of the chicharrón if using, and finish with generous amounts of onion and cilantro.
Tomatillo Avocado Salsa
10-12 large bright green tomatillos, husks removed and rinsed well, chopped.
½ small red onion, finely chopped
1 large bunch cilantro, leaves chopped (about a cup’s worth after chopping)
2-3 large, ripe Hass avocados, chopped
1 jalapeno chile, stemmed, seeded and minced. (or more to taste)
Juice of one lime
1 tsp salt
Mix all ingredients gently in a large bowl. The salsa can be made a couple of hours in advance. Refrigerate and allow to return to room temperature before serving.
Saturday, July 31, 2010
A Feast and a Fantasy
The waiter recited that morning’s menu specials and the last entrée he described was accompanied by gratin dauphinois. I should mention that said waiter was especially handsome and especially charming and he pronounced gratin dauphinois with a perfect French accent. Without missing a beat, one of my friends, Muffy, leaned over to him, pointed to a spot on her neck just under her left ear and whispered in a husky voice, “can you say that again….right here?”
It was a classically funny moment and expressed perfectly what the rest of us were thinking.
These days, it’s fantasies of Javier Bardem whispering “carne asada” against a sweet spot in that lovely Spanish accent. But what makes it sexy is that it’s cheap, quick and easy. The carne asada. Not Javier.
When you need a cheap, easy dinner party idea that will feed a ton of people and won’t require lots of last minute prep it’s time to break out the secret weapon: Café Pasqual’s Carne Asada recipe. On a recent weekend, Kathy and I both coincidentally made a batch for respective dinner parties.
Last Halloween, I pre-prepared most of this meal for Juan’s boys night dinner at the house while the girls and I went out carousing. All Juan had to do was slap the meat on the grill and slice it up.
After dinner, our friend Carlos, who we suspect knows a thing or two about great Mexican food, told Juan it was the best carne asada he’d ever had. Of course it could have been the red wine talking but we’ll take a compliment when we can get it.
Seriously it’s a fantasy come true—5 minutes of prep and happy dinner guests.
This is our go-to meal for company. It’s dirt cheap and super simple. And all you need to do when it’s time to eat is grill the skirt steak for 5 minutes and heat up some tortillas.
It’s also one of the reasons we love Costco. They always have 3-4 pound packages of skirt steak (otherwise known as Loin Flap) for about $5.60 a pound. The cut is great for quick grilling and has enough fat for meaty flavor.
We recommend brushing corn tortillas with olive oil and grilling them quickly on the Weber. Serve the tacos with whole pinto beans and a green salad. The tacos themselves are best accompanied with a fresh tomatillo and avocado salsa or any other taco toppings you like.
Carne Asada
Adapted From Café Pasqual’s Cookbook
The chile powders called for in this recipe can be procured at the Santa Fe Farmers Market or through mail order sources such as The Chile Shop in Santa Fe 505-983-6080 or the Santa Fe School of Cooking (santafeschoolofcooking.com). If you cannot locate, you can substitute other pure chile powders such as Ancho, Pasilla or a pure New Mexico Chile Powder. Don’t use the grocery store concoction labeled simply chile powder as it is actually a blend of different spices.
Serves 6-8
1 ¼ c olive oil
2 T plus 2 tsp jalapeno chile powder
2 T Chimayo chile powder
3 T chopped garlic
1 T kosher salt
1 tsp freshly ground black pepper
2 tsp red pepper flakes
2 T fresh lime juice
3 red onions, cut into quarters and separated into pieces (optional)
3 pounds beef Loin Flap (skirt steak) cut into large sections (. Flank steak can be substituted but the results won’t be quite as good
A dozen or so corn tortillas
Guacamole or homemade salsa as an accompaniment
In a glass bowl stir together first 8 ingredients. Place meat and onions if using in zip lock bags and pour marinade over dividing between bags as necessary. Seal bags and massage the meat so it’s evenly covered with the marinade. Cover and refrigerate for up to 24 hours.
When ready to cook, remove meat from refrigerator and allow to come to room temperature. Prepare a fire in a charcoal grill and when coals are ready, grill meat and onions over direct heat. The meat will only take a couple of minutes per side for medium rare. The onions may take a bit longer so remove the meat and tent with foil while the onions finish cooking.
Warm the tortillas on the grill or in a hot cast iron pan. Slice the meat thinly across the grain at a slight diagonal. Chop the onions slightly.
To serve allow guests to make tacos with meat, onions, guacamole and salsa.
Wednesday, July 14, 2010
From Mac 'n Cheese to Haute Cuisine
As a young child, my daughter Hayley was like most kids, a picky eater. Her repertoire consisted of macaroni and cheese (preferably the cartoon shaped pasta out of a box), broccoli (thank god!), pasta with butter (no parmesan!), scrambled eggs and pizza – no sauce. I was a very accommodating cook who had suffered through the "eat what's put in front of you" strong arm feeding style of my parents. Hayley's pediatrician assured me that she was getting plenty of protein and with the help of Gummi vitamins she was a well nourished and thriving child. So I went on boiling pasta and making countless pb & j sandwiches for lunch.
To my delight, during a month long road trip when she was about 12 years old, the Children's Menu finally got old. To my horror she now wanted to order filet mignon and other premium menu items. Not wanting to curb her enthusiasm we indulged her menu choices and encouraged her to try new things. The more she tried, the braver she became about unfamiliar ingredients-- to the point that she would give almost everything a fair chance—even foods most of us would immediately shun. Chocolate covered cuttlefish is one example of just how far she'll go.
On a recent Spring Break trip to Northern California Devon, Hayley and I had reserved a table at Alice Waters' Chez Panisse in Berkeley. The entire meal was heavenly. It was clear from the moment we sat down that my daughter had become a foodie right before my very eyes. She was just as excited as we were to read the menu and ponder what to order. When the waiter presented Hayley a simple salad of spring greens dressed with a light vinaigrette her eyes lit up. One taste and I thought she might cry until I saw her satisfied smile appear and she exclaimed "this is the best salad ever!"
Anthony Bourdain lists vinaigrette as something everyone should know how to prepare. Now you too can check that one off your list.
Chez Panisse Vinaigrette - Alice Waters, The Art of Simple Food
1 tablespoon red wine vinegar
Salt
Fresh-ground black pepper
3 to 4 tablespoons extra-virgin olive oil
Pour red wine vinegar into a small bowl.
Add the salt and pepper
Stir to dissolve the salt, taste, and adjust if needed. Use a fork or small whisk to beat in the extra-virgin olive oil, a little at a time.
Taste as you go and stope when it tastes right.
Variations:
Add a little pureed garlic or diced shallot, or both to the vinegar.
White wine vinegar, sherry vinegar or lemon juice can replace some or all of the red wine vinegar.
Beat in a little mustard before you start adding the oil.
For part of the olive oil, substitute a very fresh nut oil, such as walnut or hazelnut.
Heavy cream or creme fraiche can replace some or all of the olive oil.
Chop some fresh herbs and stir them into the finished vinaigrette.
Monday, July 5, 2010
Pizza and Parenting
He goes on to suggest a few things that every man, woman and teenager should know how to do:
- Chop an onion. Basic knife skills are a must
- Roast a chicken (well)
- Cook an omelet
- Grill a steak, and rest it properly
- Make a great vinaigrette (subject of a future blog post)
- Shop for fresh, seasonal produce
And so on...
We’d add one thing to the list. Our kids should learn how to barbecue a great pizza.
Between us we have two in college and one about to venture out on her own. They don’t quite believe us when we advise them,that the quickest way to win friends and influence people is with a great meal, artfully prepared. When the meal can be done on a budget, all the better.
The math alone should point our starving college kids toward learning this art as they compare a soggy, limp and greasy $25.00 pepperoni pizza from the local Domino’s to what $8.00 wisely spent at the Farmers Market and a couple cups of flour will net you.
Pizza Night is tradition at Trinity, usually falling toward the end of the second week. We dig out the carefully wrapped sage leaves from the bottom of the produce drawer, give the basil plant we’ve brought with us from Trader Joe’s a haircut, and drag out the leftover grilled veggies from previous meals. Kathy whips up the dough by hand in the morning and at cocktail hour we fire up the grill and roll out the dough on the laminated dinette table.
The barbecue technique is courtesy of Bobby Flay who gave us the original dose of courage needed to throw raw dough on a hot grill.
We didn’t make the kids take notes while they watched but we are hoping for a phone call someday when they have a crowd of college friends coming over for dinner and need a fun, cheap meal idea. Then, we’ll point them to our blog and say, “See? I told you so!”
Basic Pizza Dough Recipe
2+ cups flour
2 teaspoons salt
1 cup warm water
1 pkg yeast
1/4 teaspoon sugar or a squirt of honey
1tablespoon olive oil
Mix together flour and salt, sprinkle yeast on top of warm water sweetened with either the sugar or honey. Let mixture sit for 10 minutes. Mix together wet and dry ingredients, add olive oil and knead for a 3 minutes. Add additional flour if necessary. At this point you can either let the dough rest for a few minutes, then divide it into 3 or 4 balls, depending on your pizza size preference and roll it out or place it in a covered bowl or ziplock baggie and refrigerate for up to 24 hours. Set out and allow the dough to get to room temperature, gently knead then divide and roll out.
Brush one side of the pizza round with olive oil and toss on a hot grill. The dough will firm rapidly and you'll want to pull it off the grill in 2 to 3 minutes when the bottom of the round is crisp and slightly charred. Top the grilled side with desired toppings and place back on the grill until toppings are as desired being careful to not burn the bottom of the pizza.
Pizza with grilled Meyer Lemons, Ricotta, Carmelized Onions, Sage and Honey
Inspired by Thomas Hill Organics
Makes one pizza roughly
2 Meyer Lemons
1 cup fresh Ricotta Cheese (use whole milk store bought if that’s all you can find)
A dozen fresh sage leaves
One large onion
High quality honey (we used wildflower honey)
Olive Oil
Fleur de sel.
One round of grilled pizza dough, partially prepared as directed above.
Slice onion thinly. Heat a couple tablespoons of olive oil in a sauté pan and cook the onions over medium-low heat until soft and carmelized (about 30 minutes). Can be done well ahead and set aside.
Slice Meyer lemons thinly (1/8-1/4 inch). Pick out seeds. Brush each side of the lemon slice lightly with olive oil. Grill slices on barbecue, turning as needed until lemons are lightly carmelized in appearance.
When ready to grill the pizza, brush the cooked side of a pizza round with a light coating of olive oil. Scatter carmelized onions evenly over the pizza. Arrange grilled Meyer Lemon slices on top. Dot spoonfuls of the Ricotta cheese over. Add the sage leaves. Finish with a sprinking of Fleur de Sel.
Place dough round back on the Weber and cook with the lid on until pizza is warmed and cheese is softened (about 3-5 minutes depending on how hot the grill is).
Remove pizza to board and drizzle with honey. Slice and enjoy. This one went well paired with Evolution 9 from Sokol Blosser, a fruity white blend.
Pizza with grilled Radicchio, Pancetta and Goat Cheese.
Makes one pizza roughly.
One head of Radicchio
3-4 ounces good quality pancetta such as from Boccolone
Fresh Goat Cheese, about 3-4 ounces
Olive oil
Kosher salt
Aged Balsamic Vinegar
Note: try to search out pancetta that isn’t already sliced. The beauty of this pizza is in the nice big lardoons of pancetta.
One round of grilled pizza dough, partially prepared as directed above.
Cut the radicchio into eighths through the core so that the leaves remain attached. Brush each side with olive oil and sprinkle with kosher salt. Grill wedges on barbecue until leaves are soft and blackened in spots. Set aside. Can be done an hour or so ahead of time.
Cut the pancetta into ½ inch chunks. Heat a tablespoon of olive oil in a sauté pan and cook the pancetta slowly over medium to medium low heat until crisp. Drain on paper towels. Can be done an hour or so ahead of time,
When ready to grill pizza, brush the cooked side of a pizza round with a light coating of olive oil. Place leaves of the radicchio evenly and generously over the pizza. Scatter the pancetta on top and dot the surface with spoonfuls of goat cheese.
Place dough round back on the Weber and cook with the lid on until pizza is warmed and cheese is softened (about 3-5 minutes depending on how hot the grill is).
Remove pizza to board and drizzle with the aged balsamic vinegar. Slice and eat.