Monday, June 6, 2011

Simply summer…

This, the first weekend after Memorial Day and graduation, is supposed to be the start of summer. Admittedly here on the coast that can mean a thick coat of fog engulfs us and working in the garden requires donning a sweatshirt. However, it should not mean that we’ve got howling 30 mph winds and 1.5 inches of rain!
My big plans to work in the garden and prepare for our annual pilgrimage to Trinity Alps have been thwarted by a freak storm that makes me think we’ve been transported back to February.
So what’s a girl to do? Make a pot of stew in June? Unthinkable! Mike has proclaimed that he loves to barbecue in the rain – perfect! We’ve already been to Farmers’ Market and have a beautiful selection of tomatoes and cucumbers.
Nothing says summer like tomatoes and cucumber, right? So we grab a big thick t-bone steak, strike a match to the barbecue, shuck a couple of ears of corn to grill and pretend that it isn’t windy, cold and wet and start our summer out right with a classic backyard dinner. Even if we were indoors with the heater cranked up an extra 2 degrees for the occasion. This was the perfect end to a not so perfect summer day.
When I find myself with an abundance of tomatoes and cucumbers – which I’m hoping happens a lot this summer - I go back to a favorite salad of tomatoes and cucumbers with rice wine vinegar and feta cheese. I usually add cilantro or Italian parsley, onions if I’ve got a nice sweet onion on hand. It is a very simple, satisfying salad that takes 2 minutes to throw together.
There is no official recipe for this dish. While in Talca, Chile a few years ago we were served this at a communal dinner. When we got home I tried to recreate it and here’s what I came up with:


Tomato, Cucumber and Feta Salad

Serves 2 or 3 but is easily doubled or tripled.
1 garden fresh ripe tomato, diced
1 cucumber, seeded and diced
3 Tablespoons cilantro or Italian parsley, chopped
3 Tablespoons seasoned rice wine vinegar
2 Tablespoons sweet onion, diced
3 Tablespoons good quality feta cheese
Combine ingredients, serve at room temperature.

Sunday, May 22, 2011

Linking Up


Central Coast residents lucky enough to find themselves at a barbecue with Gil and Jennie Diaz, have probably sampled some of their delicious homemade sausages. The pair always seem to be working the grill, cooking up and sharing a variety of these artisan links with hovering and salivating partygoers.

After some not-so-subtle hinting by Kathy and me at a recent outdoor event, the pork masters graciously invited us to a day of sausage making at Chez Diaz. We joined our friends Greg, Karen, Kelly and Arent for a lesson in the craft of stuffing ground meat into casings.

These guys live large. Gil and Jennie have an infectious zest for good food and drink. When they warned that the morning was going to start off with bloody marys we knew this would be no ordinary classroom. Luckily we managed to keep the priapic humor somewhat in check and soaked up the wisdom of these two great chefs as they patiently taught this group of novices the art of meat processing. We tried our greasy hands at three varieties: Italian, Polish and Swiss.

These are probably the first recipes on Holy Mole that aren’t for the average home cook (besides the Mole). Gil and Jennie admit to burning through a Kitchen Aid and several food processors before finally buying a commercial grade meat grinder and borrowing a cast iron sausage stuffer that looks like it was made in the 1800s.

However an adventuresome amateur could have respectable results with the help of their neighborhood butcher and a Kitchen Aid sausage stuffer.

Each of the seasoning mixtures below calls for 20 pounds of pork that has been put through a 3/8 inch grind plate. The meat should be a combination of 75% trimmed pork butt and 25% pork fat. Have your butcher grind and blend the meat and fat.


One hank of hog casings was plenty for 60 pounds of sausage. Separate out the casings and run fresh water through each a couple of times. Carefully rinse the salt preservative off of the outside of them before starting. Set aside the cleaned casings in small bowls of cold water, taking care to drape an end of each over the side of the bowl so you can easily grab them when you need them.


Make sure the meat mixture is well chilled before starting to mix in the seasonings. After mixing the seasonings with your hands, taking care not to overwork the meat, chill it again for about an hour before loading the meat into the sausage stuffer. If the meat seems dry, add just enough liquid (water or more wine) so that it runs through the stuffer smoothly.


Place a casing onto the sausage tube and stuff away, keeping a gentle pressure with one hand on the end of the tube to keep out air bubbles and coiling the sausage onto a large platter. When the casing is full, gently pinch off links between thumbs and forefingers rolling the sausages a few times to separate the links.

Polish
96g Kosher Salt
14g Crushed Black Pepper
24g Ground Marjoram
24g Ground Summer Savory
½ cup minced Onion

Swiss
100g Kosher Salt
112g Dextrose
9g Allspice
57g Crushed Black Pepper
4g Cinnamon
16 cloves Garlic, pureed
24oz Red wine

Italian
70g Kosher Salt
48g Whole Fennel Seed
24g dried Oregano
24g dried Thyme
3 Cups fresh chopped Parsley
35g Crushed Black Pepper
40 cloves Garlic, pureed
10g Red Pepper Flakes
32g Dextrose

Thursday, April 21, 2011

Ode to Spring

“The coldest winter I ever spent was a summer in San Francisco” Mark Twain

Apparently he never made it to the Central Coast in spring! The prevailing northwest winds create a chill that goes straight to the bone. Wind makes me cranky. Cold northwest winds make me really cranky! I love the way spring looks but loathe the way it feels – that is until I go to the local Farmers’ Market.


Suddenly, just like the rolling hills after Winter’s rains, the local Farmers’ Market turns green. Spring has arrived! No other season’s entrance is quite as dramatic as Spring’s debut at Farmers’ Market. Seemingly overnight, the availability at the market goes from winter squash, beets and citrus to a plethora of amazing produce. Green garlic, fava beans, pea shoots, English shelling peas and the list goes on. This happy sight is just what is needed to bring me out of my spring wind funk. With all that beautiful produce I’m inspired to spend more time in the kitchen where I know I’ll be safe and warm.

Devon prepared an “Ode to Spring” dinner in celebration of the season: Cucumber Mint cocktails, warm fava bean hummus with local Sheep’s milk feta and oil cured olives, puree of fennel soup, salmon with farro, black rice, green garlic, pea shoots and tangerine. All served with a gratitude for the bounty of Spring and enjoyed with good friends and lots of laughter.

In fact, I think it warmed my soul enough to allow me to tough it out until the spring winds die down.

Fava Bean Purée with Oil-Cured Olives, Feta, and Garlic Toasts adapted from Sunday Suppers at Lucques, by Suzanne Goin

1 Baguette
1 cup extra-virgin olive oil
2 cloves garlic
2-1/2 pounds fava beans in the pod (or 2-1/2 cups shucked)
1 small sprig rosemary
1 chile de arbol, crumbled or crushed red chile flakes
1/2 lemon, for juicing
1/2 cup pitted oil-cured black olives sliced in half. If you can’t find these, substitute kalamatas
1/4 cup sliced flat-leaf parsley leaves
1/4 pound good quality feta cheese
Kosher salt and freshly ground black pepper


Preheat oven to 375 degrees

Cut baguette on the diagonal into twelve 1/4-inch-thick slices. Brush both sides of each slice generously with olive oil (about 1/4 cup in all). Arrange the slices on a baking sheet and toast them in the over 10 to 12 minutes, until golden crispy, but still tender in the center. While the toasts are warm, rub them with one of the garlic cloves.

Mince the remaining garlic clove.

Bring a medium pot of salted water to a boil over high heat.
Meanwhile, remove the beans from their pods.
Blanch the beans for about 2 minutes in the boiling water. Drain the beans in a colander, cool them in the ice water, and them slip them out of their pale green shells with your fingers.

Heat a medium saucepan over low heat. Add the remaining 3/4 cup olive oil, the rosemary sprig, and the chile. Let them sizzle in the oil a minute or two, then stir in the minced garlic. Let them sizzle in the oil a minute or two, then stir in the minced garlic. Let it sizzle for a minute and stir in the fava beans, 1/4 teaspoon salt, and some freshly ground pepper. Simmer the beans 5 to 7 minutes, stirring occasionally, until they're tender (the exact time will depend on the starchiness of the favas). Strain the beans, reserving the oil. Discard the rosemary and chile.

Transfer the beans into a food processor and purée them. With the motor running, pour in half the reserved oil to taste. Squeeze in some lemon juice, and taste for seasoning. (The amount of oil you will need depends on the starchiness of the beans.)

In a small bowl, toss the olives and parsley with a drizzle of olive oil and a squeeze of lemon juice. Crumble in the feta, tossing gently to combine.

Spoon the warm fava bean purée onto a platter. Place the grilled toasts off to one side, and scatter the feta-olive salad over the purée.

Monday, March 28, 2011

Fat, Glorious Fat

From: Chuck: Making it tonight. In the oven.
Received Wed. March 23 6:15 p.m.

From: Chuck: O.K. That was absurd. Though I fear I feel a stroke coming on….
Received: Wed. March 23 8:13 p.m.

To: Chuck: Like absurd good or absurd you hated it?
Sent: Wed. March 23 8:15 p.m.

From: Chuck: Good of course. How could you not like that?
Received: Wed. March 23 8:16 p.m.

To: Chuck: It’s probably not any worse than a ribeye.
Sent: Wed. March 23 8:16 p.m.

From: Chuck: I did not have the breast but will tomoro. I cannot imagine it will be as good as the dark meat though. I think next time I would just do thighs.
Received: Wed. March 23 8:17 p.m.

To: Chuck: Me too. No reason to do anything but thighs. Was the bread crispy on the bottom?
Sent: Wed. March 23 8:17 p.m.

From: Chuck: Totally. And this is waaaaay worse than a ribeye. With steak you don’t cook with a sponge to cook up all the rendered fat.
Received: Wed. March 23 8:27 p.m.

To: Chuck: LOL. Seriously, it’s the best thing I’ve eaten all week. My blog post will be all about fat!
Sent: Wed. March 23 8:27 p.m.

From: Chuck: We just realized: What this is, is a recipe for deep fat frying bread in chicken fat. I’ll let you ponder that for a minute.
Received: Wed. March 23 8:30 p.m

To: Chuck: Yeah....So? How is this any different than spreading schmaltz on bread….or Italian lardo? I know. It’s pretty decadent but you have to admit it’s really good.
Sent: Wed. March 23 8:31 p.m.

From: Chuck: I admit it. Totally. But certainly not a weekly dinner.
Received: Wed. March 23 8:31 p.m.

O.K. So I’ve managed to turn chicken into a guilty pleasure thanks to this recipe from Melissa Clark. So sue me. But I dare you to say this isn't the best thing you've eaten all week.


MY MOTHER'S GARLIC AND THYME-ROASTED CHICKEN PARTS
WITH MUSTARD CROUTONS
By Melissa Clark from In the Kitchen with A Good Appetite
Recipe adapted slightly.

You must use a shiny heavy metal roasting pan for this recipe, hopefully not too dark in color. I used a very heavy duty aluminum one and it worked great. Clark advises that the bread can burn if the pan is too dark.

Time: 1 hour and 10 minutes
Serves 4
One Loaf of Italian country bread, ciabatta, or other study bread, preferably stale and sliced ½ inch to ¾ inch thick. If the bread isn’t stale, bake the slices in a low oven (about 275) for about 15 minutes, flipping once, until it’s a bit dried out.

Dijon Mustard, as needed
Extra-virgin olive oil, as needed
1 1/2 teaspoon kosher salt, more as needed
Fresh cracked black pepper.
6 skin on, bone in chicken thighs
2 skin on, bone in chicken breasts
1 head garlic, separated into cloves
1 bay leaf, torn into pieces
1/2 bunch thyme sprigs

1. Preheat oven to 425 degrees. Lay the bread slices in the bottom of a heavy-duty roasting pan in one layer. Brush with mustard, drizzle liberally with olive oil and sprinkle with salt and pepper.


2. Season the chicken all over with salt and pepper and place the pieces on the bread, arranging the white meat in the center and the thighs around the sides. Scatter the garlic cloves, bay leaf, and thyme over the chicken and drizzle everything with more oil (take care to drizzle the garlic cloves with lots of oil).


3. Roast the chicken until it's lightly browned and the thigh juices run clear when pricked with a knife, about 50 minutes. If you like, you can crisp the skin by running the pan under the broiler for a minute, though you might want to rescue the garlic cloves before you do so they don't burn (if you don't plan to eat them, it doesn't matter so much). Serve the chicken with pieces of bread from the pan.

To serve, squeeze a garlic clove out on to a bread slice, spreading it over the crouton. Top the crouton with a chicken piece. Enjoy.

Saturday, March 19, 2011

Trusting your taste buds

My father was an excellent cook and my siblings and I all owe our culinary prowess to him. He imbued us each with a deep appreciation for a good meal and to treasure time spent in the kitchen cooking side by side with loved ones.

That said, we were occasionally served up some pretty unappealing looking meals at our family dinner table. A few of the more memorable dishes include boiled tongue, creamed tuna on toast and stuffed sauerkraut. The latter is a bit of a misnomer as it’s impossible to stuff sauerkraut. Rather, it was a concoction my dad invented that involved cooking the fermented cabbage for hours and hours on the stovetop with white rice and ground pork. These meals, I now suspect, were an attempt to stretch the food budget. They had one other thing in common: they were colorless, drab and completely unexciting visually. Yet they suited my childish palate perfectly and I loved them all even if they did look like something you’d be forced to eat in a prison cafeteria.

Now, as an adult, my quest for great meals is driven by the need to satisfy multiple senses. On our annual trip to Santa Fe, for instance, we’re left breathless sometimes by the works of art on our plates. It’s as if the chefs have gathered every color of the New Mexico desert and sprinkled those hues like fairy dust over their creations. This dish, a quinoa stuffed relleno from santacafe, illustrates my point perfectly.


Recently, Kathy and I both test drove a recipe for another childhood favorite: Corned Beef. The recipe looked too good to be true. A simple brine, five days in the fridge, and voila! Corned beef sans chemicals. These days, we’re a bit more mindful of what we ingest so we both decided to forgo the pink salt, otherwise known as curing salt, because it contains sodium nitrite. Neither of us realized the consequence that would have on the look of the finished product.

Unfortunately the end result was about as visually stunning as the boiled tongue referenced above. I didn’t help matters by serving my dreary looking brown beef on a brown plate. However, comparing notes today, Kathy and I both agree that the taste won us over. This is delicious corned beef and as my 19 year old son remarked as he was gobbling it up, it doesn’t have that overwhelming processed taste that pre-brined ones can have.

We’ll leave it up to you as to whether to omit the pink salt or not. If you choose to make it without, just remind your guests that sometimes looks aren’t everything.

Corned Beef and Cabbage

Adapted from Saveur Magazine

SERVES 10


1 tbsp. allspice
1 tbsp. cloves
1 tbsp. coriander
1 tbsp. crushed red chile flakes
1 tbsp. mustard seeds
1 tbsp. whole black peppercorns
5 bay leaves, crumbled
1 1/4 cups kosher salt, plus more to taste
3/4 cup sugar
1 tbsp. pink salt (Curing salt)
1 5-lb. first-cut beef brisket
4 cloves garlic
1 medium onion, peeled and quartered
3 lbs. small new potatoes, peeled
1 head green or Savoy cabbage, cored and shredded
1 tbsp. fresh lemon juice


Combine spices and 3 bay leaves in a 12″ skillet over medium heat. Cook, swirling pan constantly, until spices are toasted and fragrant, about 3 minutes. Transfer 3/4 of the mixture (reserving the rest in a covered jar) to a 5-qt. pot and add 8 cups water, kosher salt, sugar, and pink salt. Bring to a simmer; remove pot from heat and let cool to room temperature. Refrigerate brine until chilled. Add brisket and weigh it down with a plate so brisket is submerged. Refrigerate for 5 days.

Drain corned beef and rinse. Transfer beef to a 5-qt. pot along with the reserved pickling spices, garlic, and onion. Cover corned beef with cold water. Bring to a simmer over medium heat and simmer until corned beef is tender, about 2 1/2 hours. Remove pot from heat and set aside.


Meanwhile, put potatoes into a 4-qt. pot of salted water and bring to a boil. Reduce heat to medium-low and simmer until potatoes are tender; drain. Put cabbage into a 3-qt. pot over medium-low heat, season with salt, add lemon juice and 1/2 cup water, cover, and bring to a boil. Reduce heat to low and cook, stirring occasionally, until cabbage is tender, about 30 minutes. To serve, transfer potatoes and cabbage to a large serving platter. Transfer corned beef to a cutting board, thinly slice beef across the grain, and transfer to the platter. Spoon some of the cooking liquid over the beef and serve warm.

Friday, March 11, 2011

Drowning your Sorrows in Dulce de Leche


Ok, so while our daughter was running around Patagonia recently with our good friends Kelly and Arent, I was left behind to drown my sorrows. Rather than turn to Malbec at 10:00 in the morning, I turned to dulce de leche instead. Hayley had sent us a jar during her first months in Buenos Aires. I'd opened it, tasted it, and then set it aside for a special occasion. Well, being left behind on a blustery winter day while they enjoyed a beautiful South American summer day was occasion enough for me break out that creamy and delicious jar of "sweets made of milk".


I remembered seeing a recipe in the holiday issue of Saveur magazine. Thankfully I didn't even have to venture out of the house as I had all of the ingredients in the pantry. While I used my jar of dulce de leche, lots of people claim that you can boil a can of condensed milk for 3 or 4 hours and find dulce de leche inside when the can is opened. I have nightmares about the can exploding in my kitchen every time I consider trying it. If you want to try it, let me know how it goes…otherwise I think you can buy it in the Latin food section of your grocery store.


This recipe makes about 20 cookies. They were just complicated enough to take my mind off the wanderings of my loved ones but not so hard that they frustrated me. Thankfully I only needed one to mend my lonely soul. The rest were divided among other loved ones who have supported our family through the trauma of sending a child abroad for a year.


The only changes I made to the recipe were to roll the cookie edges in shredded unsweetened coconut after they were assembled and sprinkled them with a light dusting of powdered sugar. I'd seen another recipe that suggested it. Tasted good and helped manage the sticky dulce de leche when it seeps out from between the 2 cookies.


Alfajores

1 2/3 cups cornstarch
1 1/4 cups flour
1 tsp. baking powder
2/3 cup sugar
10 tbsp. unsalted butter,
softened
1 tbsp. cognac or brandy
1/2 tsp. lemon zest
4 egg yolks
Canned dulce de leche, for filling
cookies

Heat oven to 350°. In a bowl, sift together cornstarch, flour, and baking powder; set aside. In a mixer fitted with a paddle, beat together sugar and butter until fluffy. Add cognac and zest; beat. Add yolks one at a time; beat. Add dry ingredients; mix. Transfer dough to a floured surface, knead briefly; divide into 3 pieces. Working with 1 dough piece at a time, roll dough to 1/4" thickness. Using a 2 1/2" round cookie cutter, cut out cookies; transfer to parchment paper—lined baking sheets, spaced 1" apart. Reroll scraps and repeat. Bake until golden, 12–15 minutes. Let cool. Flip half the cookies over; top each with 1 heaping tsp. dulce de leche. Top with remaining cookies.

Tuesday, February 22, 2011

Back to Basics

“Beautiful Soup! Who cares for fish, game or any other dish? Who would not give all else for two pennyworth only of beautiful soup?”
Lewis Carroll (1832-1998)

“To cook is to lay hands on the body of the world.”
John Thorne


My adventures in the kitchen this past week are a riches to rags story.

Juan returned home on Monday from a weekend dive trip to Santa Rosa Island, one of the two northern-most Channel Islands. Unfortunately, he returned with barely half a limit of California Spiny Lobster, Panulirus interruptus.

I quickly decided it didn’t matter when he opened the ice chest to reveal a 6 ½ pound behemoth. It dwarfed the two smaller lobsters next to it.


It was Valentine’s Day and we’d been planning to cook some lobster for dinner, figuring he’d come home with at least one. The two small crustaceans would be more than enough for a meal, Juan insisted, adding that we should freeze the monster and serve him up at a dinner party. A debate ensued over which lobster to cook while Juan struggled to hold the squirming beast for a photo.

Killing one’s own food doesn’t happen much for suburban dwellers like me. I tend to catch and release when fly fishing and the closest I’d come lately to personally delivering a death sentence was plunging some Dungeness crabs into boiling water.

This guy definitely gave me pause. It was hard not to feel a bit of a pang knowing he’d escaped commercial traps for so many years. If we were going to eat him, it didn’t seem right to relegate him to the deep freeze. We needed to enjoy him fresh out of the sea.

I won the argument with that bit of reasoning and with that, the huge creature snapped its tail, arched its back and flew out of Juan’s hands onto the driveway with a loud smack. We quickly ushered him, only slightly subdued, into the kitchen.

We boiled him for a few minutes, split him open and rubbed the meat with olive oil, kosher salt and freshly ground pepper, then broiled both halves under the broiler until just barely done.
The tails were plated up with simple accompaniments: pinto beans, brown rice, grilled flour tortillas and limes. I was reminded of afternoons in Puerto Nuevo, Baja California, back when the restaurants there served real lobster. Tuesday night we had leftover lobster in an aromatic tomato sauce tossed with pasta.
Wednesday night we had lobster tacos, piled high with cilantro and avocado.

By Thursday night was I was wishing I’d lost the argument and we’d cooked the smaller lobster.

Friday night, I arrived home from work to find a box from Amazon on the doorstep. It turned out to be gift from my sister; Melissa Clark’s new cookbook In the Kitchen with A Good Appetite. I’ve long been a fan of Clark’s New York Times column and had given the book to my sister for Christmas, knowing she too is an admirer of her straightforward, unfussy recipes and inspiring narrative. Now my sister was returning the favor and after a week’s worth of lobster over-indulgence, her timing was perfect.

I opted for the restorative power of a great pot of soup and was happy to find, early Saturday morning, that I had all the ingredients on hand for this one. It was just what the doctor ordered: unpretentious, bright, meatless (except for the stock) and soothing. And, while it’s clearly good for you, it’s also very, very good.


Red Lentil Soup With Lemon


Very slightly adapted from Melissa Clark’s In The Kitchen With A Good Appetite


Time: 45 minutes
3 tablespoons olive oil, more for drizzling
2 large onions, chopped
4 garlic cloves, minced
2 tablespoons tomato paste
2 teaspoons ground cumin
1/2 teaspoon kosher salt, more to taste
1/2 teaspoon ground black pepper
1/2 teaspoon red Aleppo pepper (or a pinch of ancho chile powder)
2 quarts chicken or vegetable broth (I used homemade turkey stock)
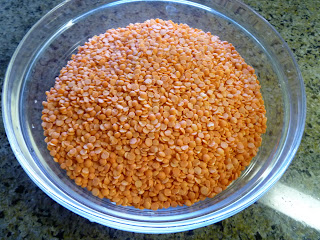
2 cups red lentils
2 large carrots, peeled and diced
Juice of 1 lemon, more to taste
1/3 cup chopped fresh mint. Can substitute fresh cilantro or parsley.
1. In a large pot, heat oil over high heat until hot and shimmering. Add onion and garlic, and sauté until golden, about 4 minutes.
2. Stir in tomato paste, cumin, salt, black pepper and chili powder or cayenne, and sauté for 2 minutes longer.
3. Add broth, 2 cups water, lentils and carrot. Bring to a simmer, then partially cover pot and turn heat to medium-low. Simmer until lentils are soft, about 30 minutes. Taste and add salt if necessary.
4. Using an immersion or regular blender or a food processor, purée half the soup then add it back to pot. Soup should be somewhat chunky.
5. Reheat soup if necessary, then stir in lemon juice and mint. Serve soup drizzled with good olive oil and dusted lightly with Aleppo pepper if desired.
Yield: 6 servings.