Saturday, November 10, 2012

Fall’s Bounty: A Golden Opportunity for Soup

Nothing like a trip to Santa Fe with my friends to get the creative juices flowing in the kitchen.  I’ve often thought it was the crisp fall air that makes me so hungry while I’m there. This year proved to be the warmest October in nearly a decade of fall visits. We were greeted with warmth and sunshine; balmy 70 degree days and cool evenings-- not the typical freezing nights we’ve experienced in the past. Still the colors of fall were there in all of their golden glory and the smell of roasting chiles lingered in the air.  My appetite was kicked into gear.

From our first night at Café Pasqual’s with their rich and delicious mole to our last night at Santacafe – a decedent rib eye alongside red chile Béarnaise, lovely food and friendly service from a variety of restaurants graced our evenings in between. The food in Santa Fe has never been a disappointment, this year it was off the charts. Truly an inspiration….

 Home now with a handful of beautiful Anasazi beans fresh from my garden I ponder my options. My first inclination is to just make a simple pot of beans. I love the flavor of beans and have become a huge fan of Rancho Gordo Heirloom Beans. This mail order company based in Napa offers hard to find varieties and it’s hard to argue with the simple methods by which they recommend you use them.

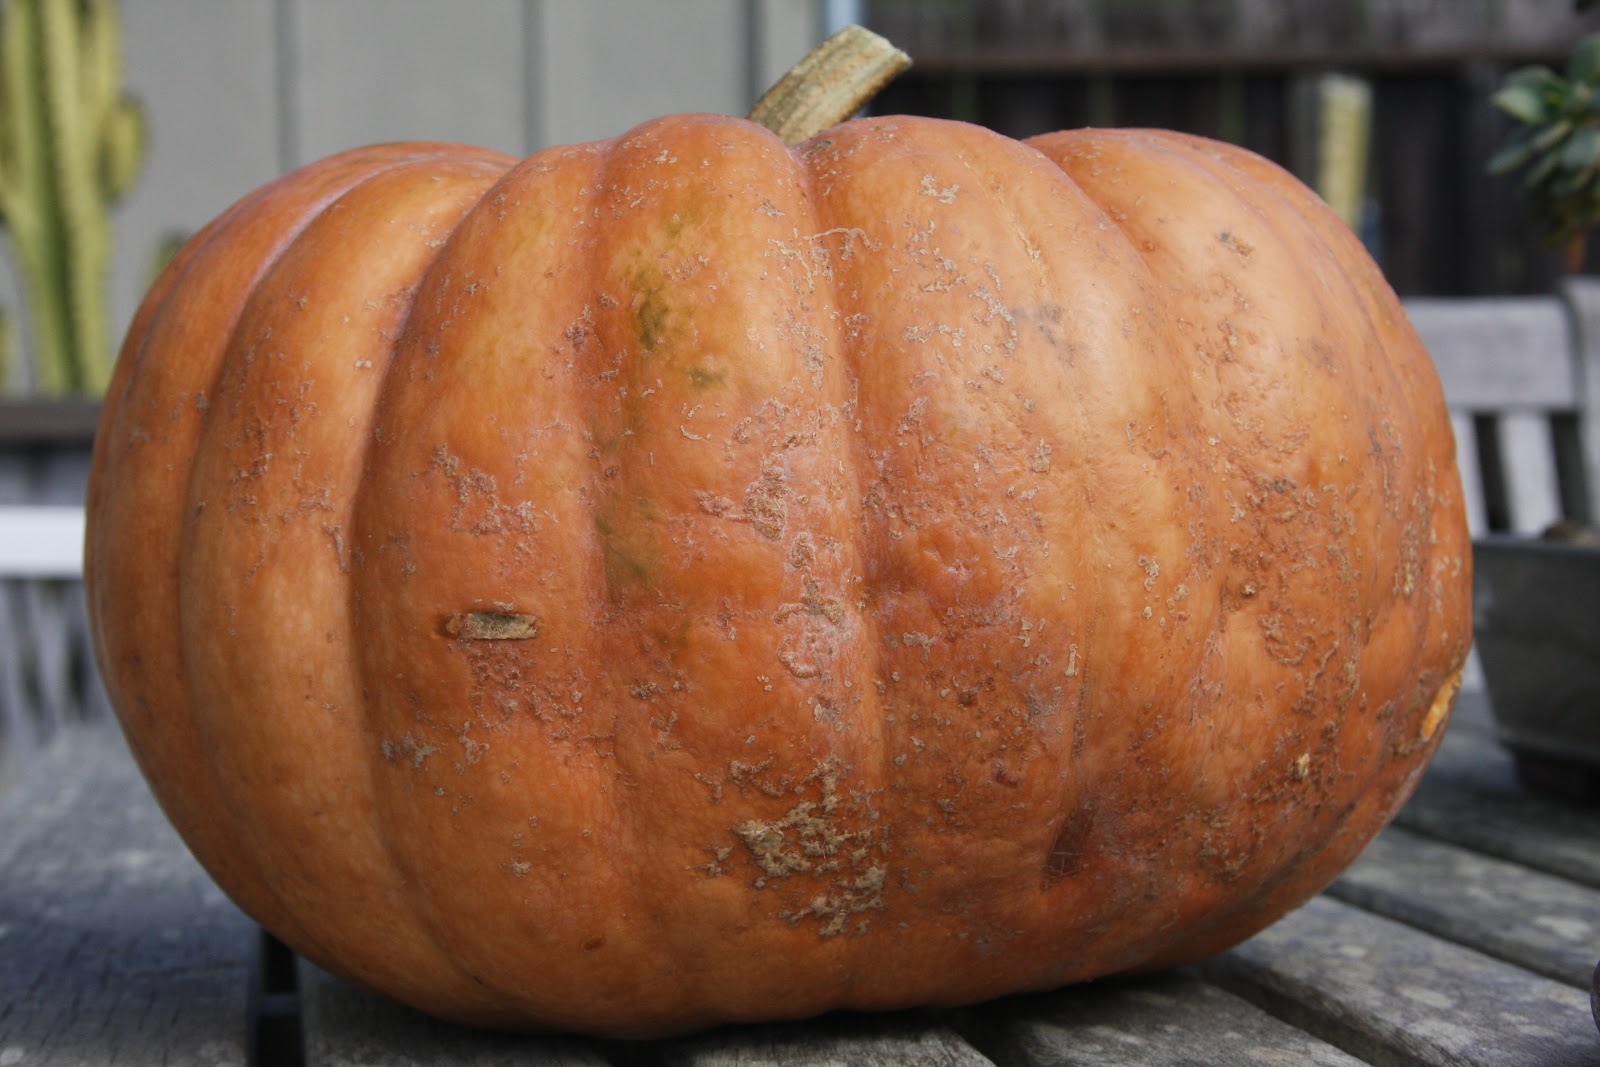
Then I remember the beautiful Chioggia squash on my front porch. This big warty bluish squash was grown on a ranch in Cayucos in our coop garden. Ahhh, what better way to use my handful of beans than to marry it with a delicious squash in a hearty fall soup with a bit of sage and some roasted pasilla chiles. The great thing about soup is that you can adapt a soup to fit what you’ve got in your cupboard. This recipe is adapted from a white bean and butternut squash recipe from an old Gourmet magazine. Here’s the version I made with my Anasazi beans, Chioggia squash and the last of this year’s tomatoes.

Chioggia Squash and Anasazi Bean Soup

1 cup of Anasazi (or other white beans).

3 cups water or broth

1 garlic clove, minced

2 tomatoes, skinned, seeded and chopped

3 cups of Chioggia (or other winter squash)

1 pasilla chile, roasted, skinned, seeded and chopped

1 teaspoon fresh sage, finely chopped

½ cup finely grated pecorino cheese

Cook the beans in water or broth until almost tender. Add garlic, tomatoes and squash adding broth or water as needed. Cook until squash is tender.  Smash some of the squash against the side of the saucepan to thicken the soup slightly. Add pasilla chile, sage and cheese. Season with salt and pepper to taste, serve.


Monday, March 26, 2012

Bon Appetit's Dish of the Year


How to Make a Porchetta in 4 “Easy” Steps             

  1. Take a trip to Italy to research the origins and classic traditions of this national culinary treasure.  Like the ubiquitous taco trucks on L.A. street corners, Porchetta trucks abound in central Italy, especially Umbria. There, Italians line up patiently for some of this porcine goodness which the porchetta vender will slice off of the mahagony colored roll to order.  Most enjoy it on the spot, thinly sliced into a Panini (sandwich). Traditionally this amazing roast is from a pig that’s been boned, stuffed with savory aromatic herbs like Sage, Fennel Pollen and Rosemary, and rolled tightly around some of the entrails, like the liver, and the heart.  The skin of the pig keeps things moist while it roasts for long, slow hours on a spit over a wood fire.  


The trip to Italy should include further research into which cooking methods to avoid when making a DIY Porchetta. For instance, a novice porchetta maker should definitely avoid trying to cook a ready made one from an Italian grocery store in one’s vacation rental kitchen where the only pan is a non-stick frying pan and the kitchen is Barbie doll sized.  There, where you have no recipes to rely on, you and your friend Tim may wrongly attempt to sear it first in the teeny tiny frying pan which will immediately fill the Barbie doll sized kitchen, and the rest of the apartment, with smoke.  Luckily the final product will still be delicious, albeit scorched blacked in spots, and will be enough to convince you more research is in order.

  1. Convince your husband that you and your BFF must take a girls only trip to San Francisco to do yet more Porchetta research. After all, Bon Appetit crowned Porchetta the Dish of the Year in 2011. This thinly disguised journey will happily give you the opportunity to dine and drink in San Francisco’s best restaurants, shop madly, and enjoy the big city sights.  Saturday morning’s breakfast at the Ferry Building Farmers Market should consist of the Roli-Roti Porchetta sandwich, the best porchetta this side of Italy.  This juicy, crunchy, dripping sandwich will be the last bit of inspiration you need. After your sandwich you’ll visit vendors selling locally grown meat and you and your friend will briefly consider buying a ready made Porchetta roast for $110.00.  Reason will ultimately prevail. You will gamely decide to tackle a real Porchetta from scratch. Well, one without the entrails at least.
A trip to the Fatted Calf Charcuterie in Hayes Valley on the way out of town Sunday morning is revelatory. There, in the butcher’s case, crying out to go home with us, is a huge slab of Skin-on Pork Belly. We don’t even blink at the $44.00 price tag.  Baby in tow, we head home.


  1. Arrange a dinner party with carnivorous friends and schedule yet another girls night with your BFF to assemble the Porchetta a couple nights in advance.  The girls night can include yet more wine drinking and frivolity but when time comes to roll the pork belly around the pork loin you better have your wits in order.  If not, you’ll find that the pork belly doesn’t fit quite all the way around the pork loin leaving a rather large gap and you will panic. A frightened look at the clock will reveal it’s almost 7:00 pm. And there’s probably no such thing as a 24 hour Porchetta Hotline. If you’re lucky, you’ll remember that there’s probably still someone on duty at the Fatted Calf Chacuterie and if the gods are smiling, someone will answer the phone. A reassuring man’s voice on the other end of the line will talk you off the ledge and assure you that a small gap in the roast is no big deal.

  1. Two days later, after the baby has had a long, slow, rest in the fridge, it’s time to cook.  With any luck will this blessed event will take place in the BFF’s kitchen, not yours. Alas, at the last minute you may decide more intensive research is in order to prevent one’s home kitchen from filling with smoke. The Bon Appetit recipe advises cooking at 500 degrees for 40 minutes before turning the temperature down.  Some labored and panicky internet surfing will lead you down a safer path: a lower (less smoky) temperature espoused by the Fatted Calf.
 
  1. Pull the roast out of the oven when the internal temperature of the loin hits 138-140 degrees.  Let rest for at least 30 minutes while the temp rises to 145. Now for the easy part: Slice, plate, make a toast to your gorgeous masterpiece, and eat.


Porchetta
Adapted from Bon Appetit Magazine
About 12 servings

>1 5–6-pound piece fresh pork belly, skin on (look for one that’s big enough to wrap around a loin)
1 (trimmed) 2–3-pound boneless, center-cut pork loin
3 tablespoons fennel seeds
2 tablespoons crushed red pepper flakes
2 tablespoons minced fresh sage
1 tablespoon minced fresh rosemary
3 garlic cloves, minced
Kosher salt
1 orange, seeded, thinly sliced


Put belly skin side down; arrange loin in center. Roll belly around loin so the short ends of the belly meet. If any of the belly or loin overhangs, trim meat. Unroll; set loin aside.
Toast fennel seeds and red pepper flakes in a small skillet over medium heat until fragrant, about 1 minute. 


Tip spices into a bowl; let cool. Finely grind spices in a spice mill and transfer to a small bowl, along with the sage, rosemary, and garlic; set fennel mixture aside.
Assemble porchetta according to steps 1-5.


Refrigerate roast, uncovered, for 1–2 days to allow skin to air-dry; pat occasionally with paper towels.
Let porchetta sit at room temperature for 2 hours. Place into a pre-heated 375 degree oven. After about 40 minutes, when the roast begins to brown, turn the oven down to 325 degrees and cook for approximately two to three hours. Your porchetta is done when a thermometer inserted into the thickest part of the roast reads 140 degrees.

 If skin is not yet deep brown and crisp, increase heat to 500°F and roast for 10 minutes more. Let rest for 30-45 minutes. Using a serrated knife, slice into 1/2" rounds.

To assemble:
1. Set belly skin side down. Using a knife, score the belly flesh in a checkerboard pattern 1/3" deep so roast will cook evenly.


2. Flip belly skin side up. Using a paring knife, poke dozens of 1/8"-deep holes through skin all over belly. Don't be gentle! Keep poking.
3. Using the jagged edge of a meat mallet, pound skin all over for 3 minutes to tenderize, which will help make skin crispy when roasted.
4. Turn belly and generously salt both it and loin; rub both with fennel mixture. Arrange loin down middle of belly. Top with orange slices.


5. Roll belly around loin; tie crosswise with kitchen twine at 1/2" intervals. Trim twine. Transfer roast to a wire rack set in a rimmed baking sheet.


Sunday, February 12, 2012

Traditions, heros and pumpkins

For the second year in a row Devon and I have gone to San Francisco on Super Bowl weekend. Both years the weather has been spectacular.  Temperatures in the 60’s, sunny skies, calm winds and a minimal amount of tourists lurking about (vs our trip in August with gray skies, howling winds and hordes of tourists). Yet another tradition in the making!

Prior to our departure we spend a fair amount of time researching restaurants and different forms of entertainment. One thing is certain – we have to go to Farmers’ Market at the Ferry Building and feast on the Roti-Roti porchetta pork sandwich, hopefully early enough that we’ll have an appetite in time to have lunch at one of our chosen restaurants.

Our restaurant research this year sent us to Aziza for dinner on Saturday night. A beautifully understated dining room with an unassuming clientele and amazing Moroccan food – fresh out of the oven flat-bread with a variety of spreads; chickpea, yogurt-dill, piquillo-almond. Big fin squid artichoke, citrus, piquillo, olive. Duck confit basteeya, raisin, almond. Chicken, preserved lemon, hen of the woods, celery root. Lamb shank, barley, prune, saffron. Cake, lemon ice cream, mint cream, caramel, blood oranges. Tisane, herbal, fresh mint tea.

The highlight of the meal, outside the food, was that famed food author and my hero, Michael Pollan was seated at an adjacent table. I was lucky enough to be facing the right direction and recognized him the minute he sat down. We were too shy to approach – he was with his wife and I’m guessing her parents. Every time the server placed a dish on their table I was craning to see what selections had been made. And every time I did that Mrs. Pollan took notice. I hope she was flattered rather than annoyed.  I couldn’t have been more excited if it were Mick Jagger sitting at the next table and the sighting left me with an extra dose of inspiration.

Back home in Cambria, with a fresh dose of inspiration, I noticed a recently purchased winter squash waiting to be turned into soup. We are fortunate to have Dos Pasos Ranch bringing some wonderful locally grown heirloom squash to our Farmers’ Market. The proprietor, Beth Kendall, knows her squash. You can tell her you’d like to make a soup and depending on what kind of soup you like she’ll suggest the best candidate or candidates available. Sometimes it is a combination, maybe one variety that has a characteristic flavor and then another drier or fruitier variety to balance the texture or flavor.  Or if you want to make something other than soup she’ll steer you in the right direction of whatever you happen to be cooking up.

My most recent purchase was a Musquee de Provence which looks a bit like Cinderella’s carriage. Its flesh is bright orange and it is sweet. To balance the texture I was advised to add a small acorn type squash. I decided to turn them into a luxurious Coconut Milk, Lime Pumpkin Soup.

 (Besides Cambria Farmers’ Market Dos Pasos sells at Paso Robles and Templeton Markets).


Coconut Milk, Lime Pumpkin Soup

1 large winter squash (butternut squash works)

2 tablespoons olive oil

1 onion

1 jalapeno

1 teaspoon oregano

¼ teaspoon cayenne pepper (to taste)

1 can of unsweetened coconut milk

Chicken or vegetable broth

Salt

White pepper

1 lime

Pre-heat oven to 375. Cut squash in half and place cut side down on a rimmed cookie sheet and roast until tender (about 45 minutes)

Chop onion and jalapeno and sauté in olive oil until tender but not brown.

Spoon flesh out of cooked squash halves and add cooked squash, oregano cayenne pepper and coconut milk to onion, jalapeno mixture and bring to a simmer. Using an immersion blender, blend until smooth, adding broth as needed for the desired consistency. Add salt and pepper to taste.

Zest a lime. Add the zest and juice of one lime to the soup and garnish with lime zest.


Sunday, December 4, 2011

The Other White Meat


When I tell someone how much I love to eat rabbit I usually get one of two reactions.  Either he wrinkles his nose, screws up his face and envisions eating a giant rat or he puts on a sad clown face and imagines the family pet going under the knife.  (See Kathy’s previous post about Mike’s reluctance to dine on rabbit).

Such was Tim’s reaction when we invited him to dinner this weekend. He told the story of his father, a gentleman farmer, who after experimenting with various forms of livestock many years ago, decided to raise rabbits.  One day, the father told his sons he was going out to harvest some rabbits.  The boys didn’t give it much thought until later that night when they were served a funny looking chicken for dinner.  With horror, Tim realized how his father had spent the afternoon.  “Is this Fluffy or Snowball?” he sadly asked his dad.

People who don’t think twice about eating a pig or a lamb get all misty eyed when faced with eating a fluffy cousin of Bugs.  Even my husband, usually devoid of any sentimentality where pets are concerned, whined a bit about how cute the rabbit I was struggling to butcher probably was at one point.  “Poor fuzzy little thing,” He whimpered.

Granted, a whole frozen bunny looks a bit scary on a butcher block but my love for rabbit has long outweighed any squeamishness I may have early on about this underappreciated meat.  I ordered it twice while in Italy recently because I knew it’s next to impossible to find locally.

So when Kathy and I saw them for sale recently at the Hollywood Farmer’s market I snapped up the last one, bought a second later at a local butcher shop and started menu planning.

For the record, rabbits aren’t rodents.  They are members of the order Lagomorpha. They also don’t taste like chicken. They are much, much better.

I promise I could make a convert out of you.  

Braised Rabbit with Lemons and Rosemary
 
Serves 6 generously or 8.

Slightly adapted from Oranges and Olives by Sara Jenkins and Mindy Fox (one of our favorite cookbooks).


The lemon peel in this recipe is sublime with each bite of rabbit. As a result I’ve added more here than originally called for.  Jenkins and Fox advise getting a nice brown crust on the rabbit before adding liquid—a step that requires patience and not over-crowding the pan. Otherwise the meat steams rather than browns.

This rabbit should be served with polenta, rice or plain smashed potatoes. And for a bit of color and comedy, roasted carrots are a great side.

4 Lemons, preferably organic, unwaxed and unsprayed.
Two 2 ½ pound rabbits, cut lengthwise in half then into 8 roughly equal pieces.
Kosher salt and fresh, coarsely ground black pepper
¼ cup plus two tablespoons olive oil
4 garlic cloves, peeled and smashed
8 fresh rosemary sprigs cut in half crosswise
2 cups dry white wine
1 cup water

Note: I ended up using about 50% more wine and water in the same proportions to yield enough volume to just cover the meat.


Preheat oven to 350 degrees

Cut the peel from the lemon using a vegetable peeler in wide vertical strips. Avoid the bitter white pith and set aside.

Pat the rabbit dry and season with salt and pepper. Heat the olive oil over high heat in a heavy enameled cast iron Dutch oven (or other heavy pot).  Add 3-4 rabbit pieces and brown well on all sides (about 4-6 minutes per side). Remove to a bowl as they are done and repeat with the remaining pieces.

Reduce heat to low and add the 2 tablespoons of oil. Add the garlic, lemon peel and rosemary and cook, stirring occasionally, until the garlic is slightly brown, about 2 minutes.  Add wine, bring to a simmer, and scrape up any brown bits on the bottom of the pan.  Add the rabbit pieces and any juices, putting the largest, meatiest pieces on the bottom of the pan.

Add the water, bring to simmer, cover and braise in oven until rabbit is tender, about one hour and 20 minutes.

Remove rabbit to a warm platter and tent with foil. Return pot to the stovetop over high heat and reduce to one cup, about 25 minutes. 

Serve the rabbit with the juices spooned over, being sure to include some lemon peel with each serving.


Rolling Into (or Out of?) Middle Age


As previously mentioned, I turned 50 this summer.  With that milestone have come the inevitable physical signs of a half century of life and the need to eat a bit more consciously. But I’ve got company: My friends’ dietary habits are changing with the times too.  One pal can’t eat gluten. One’s off dairy. Some friends can eat sheep and goat cheese but not cow milk cheese.  Another friend will only eat meat if it once swam in the sea. While some of us are trying to make up for lost time, others in my circle have had healthy habits from the start. One friend hasn’t eaten anything with a face in decades and another hasn’t eaten red meat since we were in college.

Dinner parties these days are a bit challenging. It’s rare to host a gathering where someone doesn’t have some sort of restriction. Though all are gracious guests, the gracious host will try to adapt accordingly.  And, while I’m loathe to change my own eating habits I know that all these restrictions should really be my own. So, the discipline of thoughtful meal planning emerges a bit more often these days and nudges me into cuisines that are better suited to me now whether or not I want to admit it.

It’s hard to beat a Cowgirl Creamery Mt. Tam cheese and a hunk of salami for an appetizer but that delicious duo won’t do your cholesterol level any favors. These Vietnamese Spring Rolls will make everyone happy and they’re guilt free. One dipping sauce accommodates any vegetarians at the party and the other is fine for people on a gluten free diet. Plus, the rolls are fun to assemble and very pretty on the plate.

Vietnamese Spring Rolls with Two Dipping Sauces

Adapted from various epicurious.com recipes

It’s important to have all the ingredients prepared before beginning assembly of the rolls. Any combination of fillings works well. Feel free to omit or add filling ingredients according to what’s in your fridge. Cooked shrimp halves, julienned red bell pepper, matchstick sized pieces of cooked pork, avocado are all wonderful additions.

12 8-to-9 inch Rice Paper Rounds
4 oz. dried, thin Rice Stick Noodles (maifun
1 package Firm Tofu
Toasted Sesame Oil
Soy Sauce or Gluten Free Tamari

6-8 ounces shitake mushrooms, cleaned and stemmed
Olive Oil

One Half of an English Cucumber, seeded and cut into thin, 4 inch long spears
2 cups Mung Bean Sprouts
2 carrots peeled and shredded
2 cups Pea Sprouts (optional)

1 cup finely chopped dry roasted peanuts,

1 cup fresh mint leaves
1 cup fresh cilantro leaves
1 cup small fresh basil leaves
12 small butter lettuce or red leaf lettuce leaves


Drain block of Tofu and cut in half horizontally. Lay a couple of paper towels on top of a clean dish towel. Place each piece of tofu on top of the towels. Cover the tofu with a couple more paper towels and a second dish towel. Place a heavy skillet large enough to cover the tofu on top and allow the weighted tofu to drain for at least 30 minutes.

Preheat oven to 300 degrees.

Slice the tofu into ½ inch thick strips and place on a silpat or parchment paper on top of a sheet plan.

Whisk together a tablespoon of the sesame oil and two tablespoons of soy sauce. Brush each side of the tofu sticks with the sauce.

Bake tofu for about an hour (flipping the sticks over after 30 minutes) until the sticks are firm and golden brown. Cool.

Meanwhile, heat a tablespoon or two of oil in medium skillet over medium-high heat. Add mushrooms and sauté until soft, about 5 minutes. Cool.

Add rice sticks to a large saucepan of boiling water and cook until tender, about 4 minutes. Drain, place in bowl and toss with a tablespoon or two of rice vinegar. Cool.

Fill a wide shallow bowl or dish with warm water. Add 1 rice-paper sheet and turn until beginning to soften, about 20 seconds (sheet will still be stiff in a few spots). Remove from water; drain on linen kitchen towel.

Place a lettuce leaf across the bottom half of the rice paper round leaving a one inch border on each end. Add few mint, cilantro, and basil leaves on top. Top with a tablespoon or so of rice sticks, shaping into compact log. Top with a few bean sprouts, a cucumber spear, a couple teaspoons of shredded carrot, a tofu stick, and a couple of mushrooms. Sprinkle with some roasted peanuts. Fold bottom of each rice sheet over filling, then fold in ends and roll into tight cylinder. Place rolls, seam side down, on platter. Repeat with remaining rice paper rolls. (Can be made 6 hours ahead. Cover with damp paper towel and plastic wrap; chill.) Cut each roll diagonally in half. Arrange on platter and serve with sauces.

Vietnamese Dipping Sauce
1/2 cup fresh lime juice
2 tablespoons sugar
3 tablespoons fermented fish sauce (nam pla)*
1 tablespoon unseasoned rice vinegar
2 tablespoons chopped fresh cilantro
1 garlic clove, minced
1 teaspoon minced jalapeño chili with seeds

Whisk all ingredients in medium bowl until sugar dissolves. Let stand at least 30 minutes. (Can be made 1 day ahead. Cover; chill.)

Spicy Peanut Sauce
Makes about 1 cup

3 garlic cloves, minced
1/2 teaspoon dried hot red pepper flakes, or to taste
1 tablespoon olive oil or vegetable oil
1 tablespoon tomato paste
3 tablespoons creamy peanut butter
3 tablespoons hoisin sauce
1/2 teaspoon sugar
3/4 cup water

In a small saucepan cook garlic and red pepper flakes in oil over moderate heat, stirring, until garlic is golden. Whisk in remaining ingredients and bring to a boil, whisking. Simmer sauce, whisking, until thickened, about 1 minute. Sauce may be made 3 days ahead and chilled, covered.

Serve sauce warm or at room temperature.


Wednesday, September 7, 2011

Holy Shishito, I'm Fifty!

There’s an old Saturday Night Live sketch in which Molly Shannon plays a character named Sally O’Malley - a middle aged dancer in a red stretchy jumpsuit who kicks her leg out and exclaims “I’m fifty”. I’ve spent a lot of time this year doing my Sally O’Malley imitation as I, along with most of my friends, have reached our half century mark. My dear friends Devon and Kelly both succumbed to fifty in August. To celebrate, we headed up to San Francisco with our husbands in tow for a weekend of fine wine and delicious food.

A Saturday morning visit to the Ferry Building Farmers’ Market provided the makings of an amazing meal.

The house we had rented came with a shiny new Weber barbeque which we put to good use grilling some of the most spectacular rib eyes I’ve ever eaten. Another highlight was the discovery of shishito peppers. They were the first we’ve seen this season so we jumped at the chance to have them as a starter course for our Big Five-Oh celebration. Simple and delicious.


These peppers of Japanese origin have a lovely pepper flavor and are usually mild– although on occasion you may get a nice snappy surprise. In fact they may cause you to kick your foot up into the air and exclaim “I’m fifty”.

Shishito Peppers
Toss a couple handfuls of fresh shishito peppers into a hot skillet with a thin layer of olive oil. Sauté on medium high heat until the peppers are blistered. The peppers are best cooked in a single layer so they can blister and brown rather than steam. Remove from heat, sprinkle with sea salt and place in a serving bowl. These little morsels are finger food, though you may want another bowl that guests can use to deposit the stems.

Sunday, July 24, 2011

The Freddy Krucumber

Grilled pizza with handcrafted sausage, Indonesian Satays, and four varieties of homemade ice-cream churned up in the cabin in the afternoons were a few of the delights Kathy and I cooked on our annual trip to the Trinity Alps. We had big plans to blog about the highlights all summer but somehow that hasn’t quite panned out.

Now, a few weeks later, as my mind starts to wander at the end of a long work shift, I keep thinking back to the simplest recipe of them all.

History dictates a silly sounding cocktail at Trinity. The classic, The Rummy Dummy, was eclipsed for a few years by The Golden Wombat (a Rummy Dummy with a splash of pineapple coconut juice added to it and a squeeze of lime). Both concoctions were invented by my Dad and his pals who drank them on annual fishing trips. Dad always came back faithfully though to the Rummy Dummy as the sacred drink of Trinity.

Guiltily, I remember teaching my own daughter before she was even in Kindergarten, how to fill up a big red plastic cup with the proper proportions of Meyers Rum, Grapefruit juice and ice so that she could scamper back to the cabin alone and refill my Rummy Dummy glass while I was relaxing in the hammock.

The first evening of our trip this year featured a Rummy Dummy made with rare Rhum Negrita Bardinet, a rum no longer available in the United States. A favorite of my dad’s it was a fitting way to toast his memory and the traditions that ground us.

When Kathy and I are old(er) and gray(er) may we still be drinking this year’s cocktail created after deciding a new tradition of our own was in order.

Named after a Trinity county local we often see on our walks who bears a scary resemblance to a horror movie character, The Freddy Krucumber is the perfect summer libation. As luck would have it, there’s big patch of mint outside the cabin that gets put to good use in this drink.


The Freddy Krucumber

1 ½ ounce Cucumber Vodka (available at BevMo).
2 ½ tsp simple syrup
Juice of half a lime.
2-3 mint leaves, torn into smallish pieces
Soda water such as Pellegrino
Cucumber spears for garnish (optional)

Fill a tall glass with ice. Add Vodka, simple syrup and the mint. Muddle with a spoon to release the mint essence. Add lime juice, stir. Top off glass with soda.

Monday, June 6, 2011

Simply summer…

This, the first weekend after Memorial Day and graduation, is supposed to be the start of summer. Admittedly here on the coast that can mean a thick coat of fog engulfs us and working in the garden requires donning a sweatshirt. However, it should not mean that we’ve got howling 30 mph winds and 1.5 inches of rain!
My big plans to work in the garden and prepare for our annual pilgrimage to Trinity Alps have been thwarted by a freak storm that makes me think we’ve been transported back to February.
So what’s a girl to do? Make a pot of stew in June? Unthinkable! Mike has proclaimed that he loves to barbecue in the rain – perfect! We’ve already been to Farmers’ Market and have a beautiful selection of tomatoes and cucumbers.
Nothing says summer like tomatoes and cucumber, right? So we grab a big thick t-bone steak, strike a match to the barbecue, shuck a couple of ears of corn to grill and pretend that it isn’t windy, cold and wet and start our summer out right with a classic backyard dinner. Even if we were indoors with the heater cranked up an extra 2 degrees for the occasion. This was the perfect end to a not so perfect summer day.
When I find myself with an abundance of tomatoes and cucumbers – which I’m hoping happens a lot this summer - I go back to a favorite salad of tomatoes and cucumbers with rice wine vinegar and feta cheese. I usually add cilantro or Italian parsley, onions if I’ve got a nice sweet onion on hand. It is a very simple, satisfying salad that takes 2 minutes to throw together.
There is no official recipe for this dish. While in Talca, Chile a few years ago we were served this at a communal dinner. When we got home I tried to recreate it and here’s what I came up with:


Tomato, Cucumber and Feta Salad

Serves 2 or 3 but is easily doubled or tripled.
1 garden fresh ripe tomato, diced
1 cucumber, seeded and diced
3 Tablespoons cilantro or Italian parsley, chopped
3 Tablespoons seasoned rice wine vinegar
2 Tablespoons sweet onion, diced
3 Tablespoons good quality feta cheese
Combine ingredients, serve at room temperature.

Sunday, May 22, 2011

Linking Up


Central Coast residents lucky enough to find themselves at a barbecue with Gil and Jennie Diaz, have probably sampled some of their delicious homemade sausages. The pair always seem to be working the grill, cooking up and sharing a variety of these artisan links with hovering and salivating partygoers.

After some not-so-subtle hinting by Kathy and me at a recent outdoor event, the pork masters graciously invited us to a day of sausage making at Chez Diaz. We joined our friends Greg, Karen, Kelly and Arent for a lesson in the craft of stuffing ground meat into casings.

These guys live large. Gil and Jennie have an infectious zest for good food and drink. When they warned that the morning was going to start off with bloody marys we knew this would be no ordinary classroom. Luckily we managed to keep the priapic humor somewhat in check and soaked up the wisdom of these two great chefs as they patiently taught this group of novices the art of meat processing. We tried our greasy hands at three varieties: Italian, Polish and Swiss.

These are probably the first recipes on Holy Mole that aren’t for the average home cook (besides the Mole). Gil and Jennie admit to burning through a Kitchen Aid and several food processors before finally buying a commercial grade meat grinder and borrowing a cast iron sausage stuffer that looks like it was made in the 1800s.

However an adventuresome amateur could have respectable results with the help of their neighborhood butcher and a Kitchen Aid sausage stuffer.

Each of the seasoning mixtures below calls for 20 pounds of pork that has been put through a 3/8 inch grind plate. The meat should be a combination of 75% trimmed pork butt and 25% pork fat. Have your butcher grind and blend the meat and fat.


One hank of hog casings was plenty for 60 pounds of sausage. Separate out the casings and run fresh water through each a couple of times. Carefully rinse the salt preservative off of the outside of them before starting. Set aside the cleaned casings in small bowls of cold water, taking care to drape an end of each over the side of the bowl so you can easily grab them when you need them.


Make sure the meat mixture is well chilled before starting to mix in the seasonings. After mixing the seasonings with your hands, taking care not to overwork the meat, chill it again for about an hour before loading the meat into the sausage stuffer. If the meat seems dry, add just enough liquid (water or more wine) so that it runs through the stuffer smoothly.


Place a casing onto the sausage tube and stuff away, keeping a gentle pressure with one hand on the end of the tube to keep out air bubbles and coiling the sausage onto a large platter. When the casing is full, gently pinch off links between thumbs and forefingers rolling the sausages a few times to separate the links.

Polish
96g Kosher Salt
14g Crushed Black Pepper
24g Ground Marjoram
24g Ground Summer Savory
½ cup minced Onion

Swiss
100g Kosher Salt
112g Dextrose
9g Allspice
57g Crushed Black Pepper
4g Cinnamon
16 cloves Garlic, pureed
24oz Red wine

Italian
70g Kosher Salt
48g Whole Fennel Seed
24g dried Oregano
24g dried Thyme
3 Cups fresh chopped Parsley
35g Crushed Black Pepper
40 cloves Garlic, pureed
10g Red Pepper Flakes
32g Dextrose

Thursday, April 21, 2011

Ode to Spring

“The coldest winter I ever spent was a summer in San Francisco” Mark Twain

Apparently he never made it to the Central Coast in spring! The prevailing northwest winds create a chill that goes straight to the bone. Wind makes me cranky. Cold northwest winds make me really cranky! I love the way spring looks but loathe the way it feels – that is until I go to the local Farmers’ Market.


Suddenly, just like the rolling hills after Winter’s rains, the local Farmers’ Market turns green. Spring has arrived! No other season’s entrance is quite as dramatic as Spring’s debut at Farmers’ Market. Seemingly overnight, the availability at the market goes from winter squash, beets and citrus to a plethora of amazing produce. Green garlic, fava beans, pea shoots, English shelling peas and the list goes on. This happy sight is just what is needed to bring me out of my spring wind funk. With all that beautiful produce I’m inspired to spend more time in the kitchen where I know I’ll be safe and warm.

Devon prepared an “Ode to Spring” dinner in celebration of the season: Cucumber Mint cocktails, warm fava bean hummus with local Sheep’s milk feta and oil cured olives, puree of fennel soup, salmon with farro, black rice, green garlic, pea shoots and tangerine. All served with a gratitude for the bounty of Spring and enjoyed with good friends and lots of laughter.

In fact, I think it warmed my soul enough to allow me to tough it out until the spring winds die down.

Fava Bean Purée with Oil-Cured Olives, Feta, and Garlic Toasts adapted from Sunday Suppers at Lucques, by Suzanne Goin

1 Baguette
1 cup extra-virgin olive oil
2 cloves garlic
2-1/2 pounds fava beans in the pod (or 2-1/2 cups shucked)
1 small sprig rosemary
1 chile de arbol, crumbled or crushed red chile flakes
1/2 lemon, for juicing
1/2 cup pitted oil-cured black olives sliced in half. If you can’t find these, substitute kalamatas
1/4 cup sliced flat-leaf parsley leaves
1/4 pound good quality feta cheese
Kosher salt and freshly ground black pepper


Preheat oven to 375 degrees

Cut baguette on the diagonal into twelve 1/4-inch-thick slices. Brush both sides of each slice generously with olive oil (about 1/4 cup in all). Arrange the slices on a baking sheet and toast them in the over 10 to 12 minutes, until golden crispy, but still tender in the center. While the toasts are warm, rub them with one of the garlic cloves.

Mince the remaining garlic clove.

Bring a medium pot of salted water to a boil over high heat.
Meanwhile, remove the beans from their pods.
Blanch the beans for about 2 minutes in the boiling water. Drain the beans in a colander, cool them in the ice water, and them slip them out of their pale green shells with your fingers.

Heat a medium saucepan over low heat. Add the remaining 3/4 cup olive oil, the rosemary sprig, and the chile. Let them sizzle in the oil a minute or two, then stir in the minced garlic. Let them sizzle in the oil a minute or two, then stir in the minced garlic. Let it sizzle for a minute and stir in the fava beans, 1/4 teaspoon salt, and some freshly ground pepper. Simmer the beans 5 to 7 minutes, stirring occasionally, until they're tender (the exact time will depend on the starchiness of the favas). Strain the beans, reserving the oil. Discard the rosemary and chile.

Transfer the beans into a food processor and purée them. With the motor running, pour in half the reserved oil to taste. Squeeze in some lemon juice, and taste for seasoning. (The amount of oil you will need depends on the starchiness of the beans.)

In a small bowl, toss the olives and parsley with a drizzle of olive oil and a squeeze of lemon juice. Crumble in the feta, tossing gently to combine.

Spoon the warm fava bean purée onto a platter. Place the grilled toasts off to one side, and scatter the feta-olive salad over the purée.

Monday, March 28, 2011

Fat, Glorious Fat

From: Chuck: Making it tonight. In the oven.
Received Wed. March 23 6:15 p.m.

From: Chuck: O.K. That was absurd. Though I fear I feel a stroke coming on….
Received: Wed. March 23 8:13 p.m.

To: Chuck: Like absurd good or absurd you hated it?
Sent: Wed. March 23 8:15 p.m.

From: Chuck: Good of course. How could you not like that?
Received: Wed. March 23 8:16 p.m.

To: Chuck: It’s probably not any worse than a ribeye.
Sent: Wed. March 23 8:16 p.m.

From: Chuck: I did not have the breast but will tomoro. I cannot imagine it will be as good as the dark meat though. I think next time I would just do thighs.
Received: Wed. March 23 8:17 p.m.

To: Chuck: Me too. No reason to do anything but thighs. Was the bread crispy on the bottom?
Sent: Wed. March 23 8:17 p.m.

From: Chuck: Totally. And this is waaaaay worse than a ribeye. With steak you don’t cook with a sponge to cook up all the rendered fat.
Received: Wed. March 23 8:27 p.m.

To: Chuck: LOL. Seriously, it’s the best thing I’ve eaten all week. My blog post will be all about fat!
Sent: Wed. March 23 8:27 p.m.

From: Chuck: We just realized: What this is, is a recipe for deep fat frying bread in chicken fat. I’ll let you ponder that for a minute.
Received: Wed. March 23 8:30 p.m

To: Chuck: Yeah....So? How is this any different than spreading schmaltz on bread….or Italian lardo? I know. It’s pretty decadent but you have to admit it’s really good.
Sent: Wed. March 23 8:31 p.m.

From: Chuck: I admit it. Totally. But certainly not a weekly dinner.
Received: Wed. March 23 8:31 p.m.

O.K. So I’ve managed to turn chicken into a guilty pleasure thanks to this recipe from Melissa Clark. So sue me. But I dare you to say this isn't the best thing you've eaten all week.


MY MOTHER'S GARLIC AND THYME-ROASTED CHICKEN PARTS
WITH MUSTARD CROUTONS
By Melissa Clark from In the Kitchen with A Good Appetite
Recipe adapted slightly.

You must use a shiny heavy metal roasting pan for this recipe, hopefully not too dark in color. I used a very heavy duty aluminum one and it worked great. Clark advises that the bread can burn if the pan is too dark.

Time: 1 hour and 10 minutes
Serves 4
One Loaf of Italian country bread, ciabatta, or other study bread, preferably stale and sliced ½ inch to ¾ inch thick. If the bread isn’t stale, bake the slices in a low oven (about 275) for about 15 minutes, flipping once, until it’s a bit dried out.

Dijon Mustard, as needed
Extra-virgin olive oil, as needed
1 1/2 teaspoon kosher salt, more as needed
Fresh cracked black pepper.
6 skin on, bone in chicken thighs
2 skin on, bone in chicken breasts
1 head garlic, separated into cloves
1 bay leaf, torn into pieces
1/2 bunch thyme sprigs

1. Preheat oven to 425 degrees. Lay the bread slices in the bottom of a heavy-duty roasting pan in one layer. Brush with mustard, drizzle liberally with olive oil and sprinkle with salt and pepper.


2. Season the chicken all over with salt and pepper and place the pieces on the bread, arranging the white meat in the center and the thighs around the sides. Scatter the garlic cloves, bay leaf, and thyme over the chicken and drizzle everything with more oil (take care to drizzle the garlic cloves with lots of oil).


3. Roast the chicken until it's lightly browned and the thigh juices run clear when pricked with a knife, about 50 minutes. If you like, you can crisp the skin by running the pan under the broiler for a minute, though you might want to rescue the garlic cloves before you do so they don't burn (if you don't plan to eat them, it doesn't matter so much). Serve the chicken with pieces of bread from the pan.

To serve, squeeze a garlic clove out on to a bread slice, spreading it over the crouton. Top the crouton with a chicken piece. Enjoy.